Utilities
Ventilation and Air Quality
Ventilation equipment is not provided by Carbon and can be a long lead item.
Planning and installation should be started early in the site preparation process.
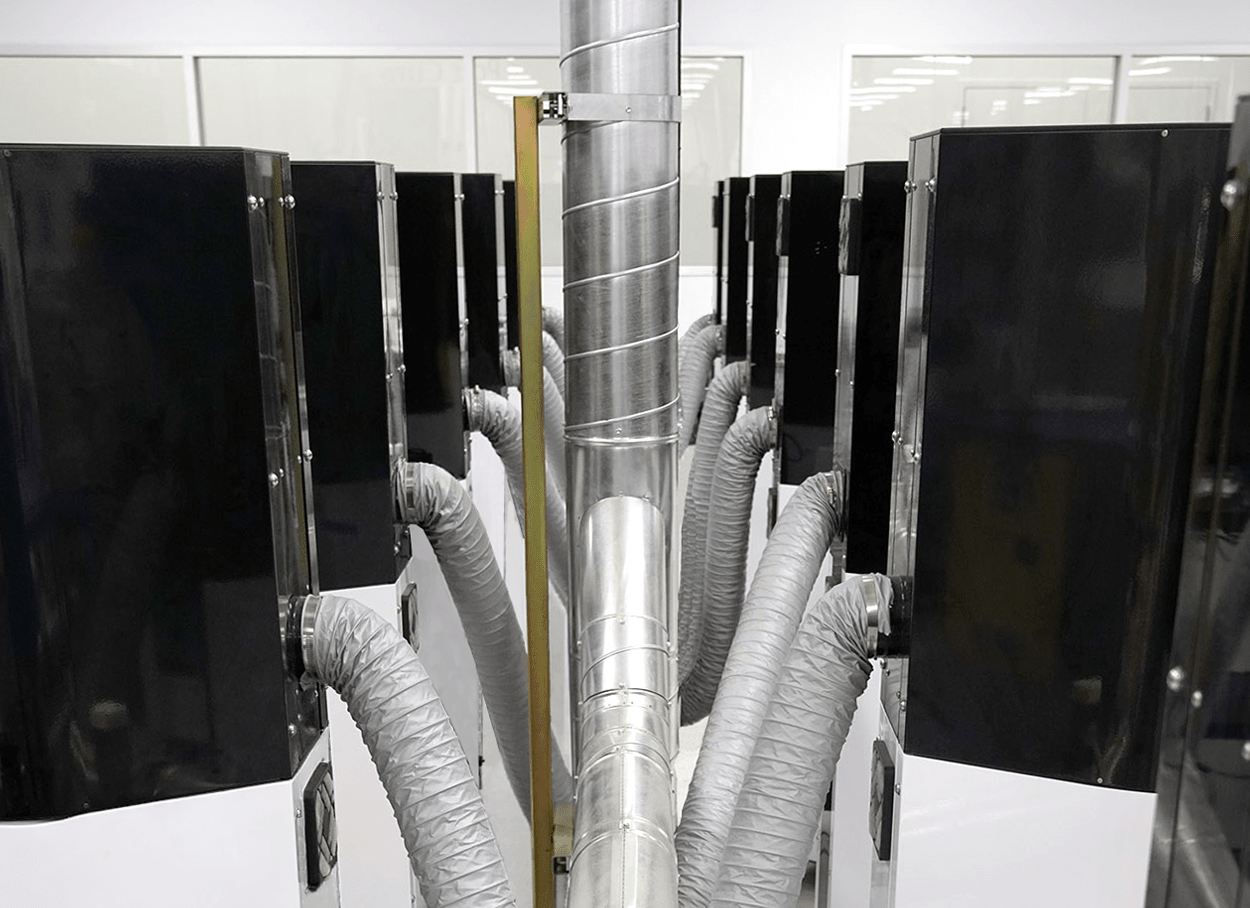
Ventilation Options
There are two options to consider when planning ventilation for your printer. Either option must meet the following requirements:
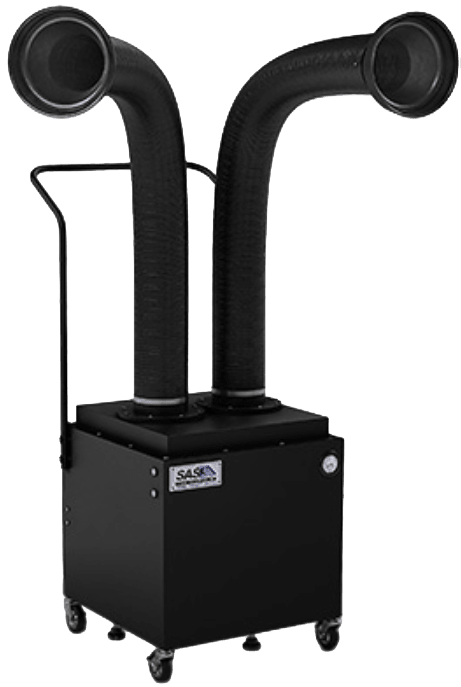
1️⃣ Fume Extractors
- Stand-alone units
- Two flexible hoses can accommodate two locations eg printer and washing workstation
- Add more extractors as needed
- Costs less than mechanical ventilation
- Easy to install
NOT compatible with:
- 2-part resins
- Ovens (UV Cure units ok)
2️⃣ Built-in mechanical ventilation
- Fan-driven flow of outdoor air which may include:
- Supply fans push outdoor air into a building
- Exhaust fans draw air out of the building
- Combination of both
- Ductwork required
- Consulting with a contractor may be required
- Long lead-time item, plan early
Reference General Site Prep for more examples.
Required for FP3D users.
For other questions about your specific ventilation situation, contact the Onboarding Team.
Requirements
You must have either a fume extractor or built-in mechanical ventilation that meets the requirements below before scheduling your printer installation.
Printers
Item | Flow Rate Requirement | Additional Requirements |
|---|---|---|
M1/M2 Printer | Minimum Flow Rate 34-51 m³/hr (20-30 cfm) per printer | Printer exhaust outlet: 4” diameter exhaust on the back of the printer |
M3 / M3 Max Printer | Minimum Flow Rate 34-51 m³/hr (20-30 cfm) per printer | Printer exhaust outlet: 4” diameter exhaust on the back of the printer |
L1 Printer | Minimum Flow Rate 85 m³/hr (50 cfm) per printer | Printer exhaust outlet: 4” diameter exhaust above the printer |
Washing
Item | Flow Rate Requirement | Additional Requirements |
|---|---|---|
Part Washing Workstation (orbital shaker) | 85 m³/hr (50 cfm) per wash area |
|
FP3D Oven Requirements
For customers that will use Carbon FP3D resin, a Yamato convection oven is necessary. See facility requirements below.
Item | Flow Rate Requirement | Additional Requirements |
|---|---|---|
Small Convection Oven ~150L oven such as Yamato DKN602 | 34 m³/hr (20 cfm) per oven 3.8 L/min (0.13 cfm) per liter of oven capacity |
|
Oven Ventilation Example
Your Onboarding Consultant will ask for a picture of each ventilation connection before scheduling the installation.
Carbon recommends a central line of ventilation with multiple drops, each with an installed blast gate and a 4" ventilation duct. This will connect to the Carbon product’s exhaust port using a hose clamp.

4" Ventilation Duct
As oven exhaust temperatures can exceed 220 °C, use a flexible hose (and hose clamp) with a high-temperature rating for at least 10 feet, such as this silicone hose example.
Blast Gate
The blast gate regulates air flow in the ventilation system.
- Begin setup with the blast gate fully open (as shown in the image).
- Check the oven's temperature against your resin's baking schedule. If the oven does not reach required temperatures within specified ramp times:
- Incrementally, reduce the opening in the exhaust duct by pushing in the blast gate until the oven can follow the schedule accurately.
- DO NOT fully close the blast gate. Air flow must be maintained.
Exhaust Adapter
Your oven is equipped with an adapter to connect the oven exhaust opening to the 4" ventilation duct.
- Attach the oven to the ventilation system using the provided adapter, which is shipped inside the oven.
- The adapter is a flanged ventilation duct with an outer ring held with three wing nuts that should be installed on top of the oven. You should connect it to the oven first so you can easily connect it to your 4" ventilation duct.
- Ensure the adapter sits tight to the top of the oven, without an air gap.
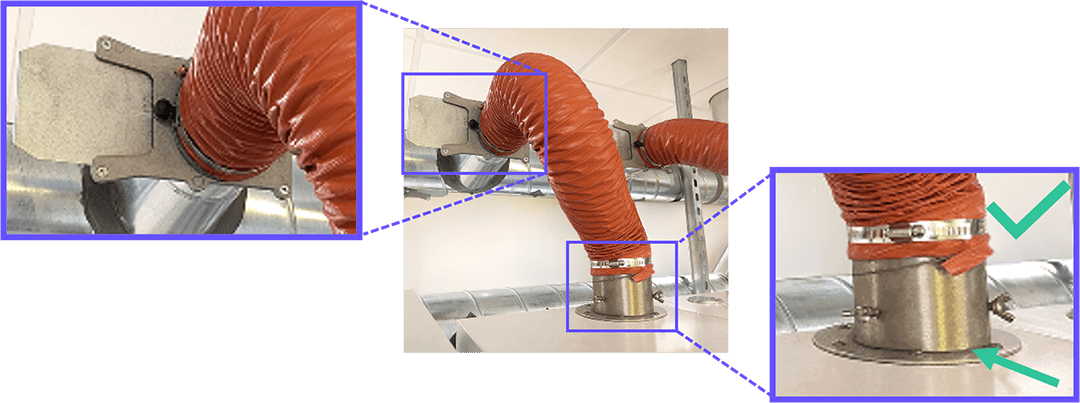
The oven exhaust connection should not have a gap at the adapter. This gap prevents accurate measurements of oven air turnover.
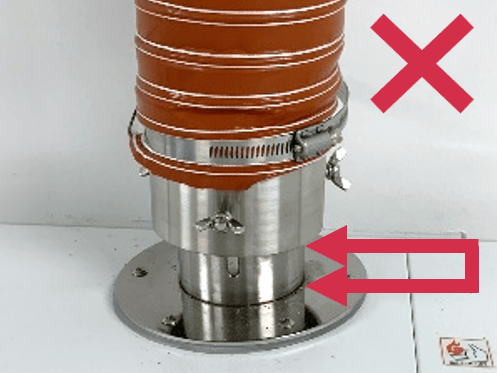
This gap was formerly recommended by Carbon. If your adapter is connected in this manner, please adjust it to a tight connection.
Checking Temperature
Once the oven has been installed and ventilated, please conduct temperature checks, using any precision oven thermometer, at 60, 120, and 220°C to ensure your oven is maintaining the proper temperature.
Condenser for High-Volume FP3D Production
If you will be using approximately 100 liters or more annually, you will need to install a condenser to prevent buildup in the ventilation ducting.
Download the handout below for more information.
Air Quality
- Printer must be installed away from sources of particulate matter: smoke, dust from grinding, milling, sanding, or polishing, or any other known sources of dust or air contaminants (internal optical equipment is highly sensitive and will degrade when exposed to significant pollutants).
- Room where printer is installed should have air filters to maintain air cleanliness.
- Above requirements do not apply to post-processing areas.
Ventilation Capacity
To test the air flow in your ventilation system, use an anemometer.
Be sure it is properly calibrated. You will need to estimate your ventilation tubing diameter, length, and bends to understand measurements for your lab.
Example Calculation
- The minimum ventilation requirement for a lab with a single M3 printer:
- One M3 printer - 20 cfm
- One Part Washing Workstation (orbital shaker) - 50 cfm
- One Small Convection Oven - 20 cfm
- is 90 cfm
Building capacity for excess ventilation is recommended to accommodate more printers and adopt future products or accessories without the need to re-engineer your lab.
FAQs and Additional Information
How do we know if our installation site has adequate air quality?
For most installation sites, air that is filtered and clean enough for workers not to wear dust masks will likely be adequate. In addition, the printer must be separated from any machines that emit smoke, dust, mist, or particles. For additional assurance, air particle counts may be tested to meet ISO 8 classification, which provides acceptable particle limits for Carbon printers.
Can I use a stand-alone ventilation system (fume extractor) instead of mechanical ventilation?
Yes, most dental customers purchase a fume extractor instead of installing mechanical ventilation to meet the site prep requirements.
However, there are several instances in which you cannot use a fume extractor.
The fume extractor is not compatible with the following:
- Non-Dental resins (Carbon 2-part engineering resins)
- Any oven other than a UV Cure unit
- Multiple M Series Printers (you will need more than one fume extractor)
For more information on fume extraction, contact the Carbon Onboarding Team.
What are the trade-offs between mechanical ventilation and stand-alone ventilation?
Installation of mechanical (traditional) ventilation is costly and time-consuming. However, it is a more effective option if you are currently using or plan to use multiple printers or additional equipment that requires ventilation.
- The Fume Extractor is recommended for single-printer sites that do not plan to add additional equipment. It is relatively low-cost and will meet appropriate health and safety requirements.
- Carbon has validated the following stand-alone ventilation system: Sentry Air Systems Model # SS-400-FSD.
Do I need a contractor for traditional/mechanical ventilation?
In most cases, you may want to use a contractor to install mechanical ventilation. A contractor can help ensure that your ventilation system meets all local and regulatory codes, as well as Carbon-recommended specifications.
Why does Carbon have a ventilation requirement?
Carbon printers require ventilation because liquid resins and solvents are classified as hazardous materials. Without ventilation, your facility could be exposed to fumes that could pose a health risk for your employees. For more information regarding health and safety, contact your local regulatory agency.
Electricity
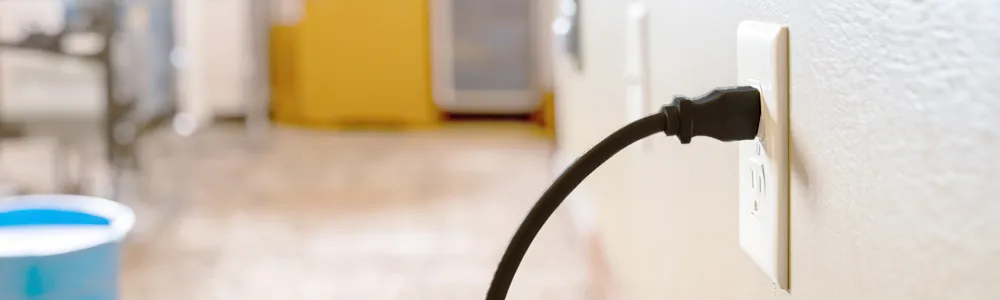
Requirements
You will be required to supply power to the following equipment and accessories:
- M1, M2, M3, M3 Max Printer(s)
- UV Curing Unit(s)
- Orbital Shaker (for cleaning parts)
- Optional: Convection oven used to cure FP3D resin
Item | M1/M2 Printer | M3 Printer | M3 Max Printer |
|---|---|---|---|
Voltage | 100-240 V 50/60 Hz single phase | 120-240 V 50/60 Hz single phase | 120-240 V 50/60 Hz single phase |
Mains supply voltage fluctuations | ±10% | ±10% | ±10% |
Overvoltage category | II | II | II |
Circuit Breaker | 15 A dedicated circuit | 15 A breaker on a dedicated circuit separate from ovens (Japan: 16 A breaker on 200 V dedicated industrial power circuit) | 20 A breaker on a dedicated circuit separate from ovens (Japan: 16 A breaker on 200 V dedicated industrial power circuit) |
Power Supply Cable | A regionally appropriate power supply cable will be supplied. | A regionally appropriate power supply cable will be supplied. | A regionally appropriate power supply cable will be supplied. |
Socket type | Standard | Standard | NEMA 5-20 |
Item | All printers |
|---|---|
Socket location | If using a Carbon-provided cable, the socket must be within 1.8 m (6’) of the power entry point on the printer. |
Non-Carbon power cords | Note: Using an inadequately rated power cable can result in electric shock, arc flash, fire, or damage to the equipment. |
UV Curing Unit Electrical Requirements
Item | Requirement |
|---|---|
Dreve PCU LED | 1.5 A: Dreve PCU LED MANUAL |
APM LED UV-Cube | See 3rd Party specifications: APM LED UV-Cube III Manual |
Dreve PCU 90 | See 3rd Party specifications: Dreve PCU 90 Manual |
Dymax ECE 5000 | See 3rd Party specifications: Dymax ECE 5000 Manual |
Otoflash Curing Unit w/Gas | See 3rd Party specifications: Otoflash Curing Unit w/Gas |
InLab Speedcure (Dentures) | Contact Dentsply Sirona Sales for more information |
Information on Applications, Resins & UV Curing Units | Your dental lab may require more than one UV curing unit depending on the types of applications you will produce. To learn more about applications, resins, and specific UV Curing Units, see the Dental Applications handout. Contact your Carbon Sales Director with any additional questions. |
Optional: FP3D Requirements
Workstation/Product | # Sockets Required Place sockets near equipment to avoid trailing power cords. | Dedicated Circuit Breaker Required | Power Requirements (100-240 VAC and 50/60 Hz) |
|---|---|---|---|
Convection Oven | 1 | Yes | 14 A |
Notes
- The oven and printer should be on separate breakers.
- Please consult with your electrician on how to best power the printer and accessories.
- See the manuals for the Yamato convection oven and APM LED UV-Cube III requirements.
Other Electrical Requirements
Item | Requirement |
|---|---|
Orbital Shaker |
|
Recommended Backup Power |
|
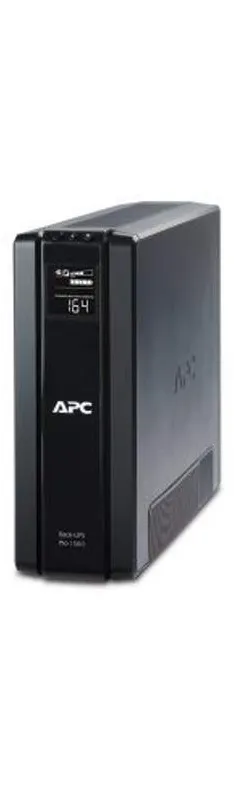
Uninterruptible Power Supply (UPS) Notes
- UPS battery back up units protect printers against power outages and surges.
- For the M1/M2 Printers, we recommend a 1500 VA uninterruptible power supply with an additional battery pack to prevent the printer from power cycling during power outages. At a minimum, you must have the printer and part washer plugged into separate power strips with adequate surge protection.
- M3 Printers draw 850 VA during unheated and 1200 VA during heated prints. You may use online tools to calculate the appropriately sized UPS and battery pack(s) for your needs.
- M3 Max Printers draw 1150 VA during unheated and 1500 VA during heated prints. You may use online tools to calculate the appropriately sized UPS and battery pack(s) for your needs.
- L1 Printers draw 1300 VA with an unheated and 2300 VA with a heated cassette. You may use online tools to calculate the appropriately sized UPS and battery pack(s) for your needs.
Electrical Requirements for Optional Accessories
Item | Requirement |
|---|---|
Formlabs Form Wash | 100–240 V 2.0 A 50/60 Hz 50 W |
Formlabs Form Wash L | Input (NA): 100–120 VAC, 50–60 Hz, 1 A max Input (EU): 220–240 VAC, 50–60 Hz, 1 A max |
For more information, go to Formlabs Form Wash.
Sockets & Amp Draw
You may need to supply power using at least 3 electrical sockets for an M1/M2 or M3/M3 Max Printer lab. For each additional Carbon product installed, you will require another electrical socket.
Note: International customers should contact Carbon for region-specific information.
Workstation/Product | # Sockets Required Place sockets near equipment to avoid trailing power cords. | Dedicated Circuit Breaker Required | Power Requirements (100-240 VAC and 50/60 Hz) |
|---|---|---|---|
Printer | 1 | Yes | 7.5 A for M1; 9 A for M2; 12 A for M3; 16 A for M3 Max |
Part Washing Workstation | 1 for orbital shaker | | 1 A |
Curing Workstation | 1 for APM LED UV-Cube III | | 2.5 A |