---
title: Part Labels
slug: software/part-labels
description: Carbon's printer software provides provides labeling capabilities. This guide walks through the tools to label your parts for serialization or with bespoke text.
docTags:
createdAt: 2024-07-01T23:04:08.324Z
---
The Part Labels tab contains tools to label your parts for **serialization **or with **bespoke text**.
# Part Label Workflow
::embed[]{url="https://vimeo.com/1044179930?dnt=1"}
:::ExpandableHeading
Video Text
- Select 2 points specify text location
- Adjust Text size as needed
- Adjust depth as needed:
- 0.3 - 0.5 mm recommended
- Choose Emboss or Engrave
- **⚠** Label preview will always appear embossed but will print as specified.
- Color tells you which is selected
- Emboss - **Light Gray**
- Engrave - **Dark Gray**
- Click Save to confirm label
- Custom text can be added
- Select an existing label to edit
- Text can be hidden
- or removed
:::
### Label Usage Notes
- A single labeled part can be duplicated and retain the same text. It is therefore advised to apply part label(s) **before laying out the build**, especially when using tokens.
- Part labels use a **single font only**: Decima mono bold.
- You can set **default part label preferences **in your [Project Settings](docId\:PqxnKG4ONeIQP4BmaSXIY) (accessed from your dashboard).
# Tokens
Tokens enable unique, serialized information per part with a single line of coded text. In other words, you can apply the same part label to all parts on a build and the printed parts will be differentiated per the token's purpose.
**Part Tokens Key**
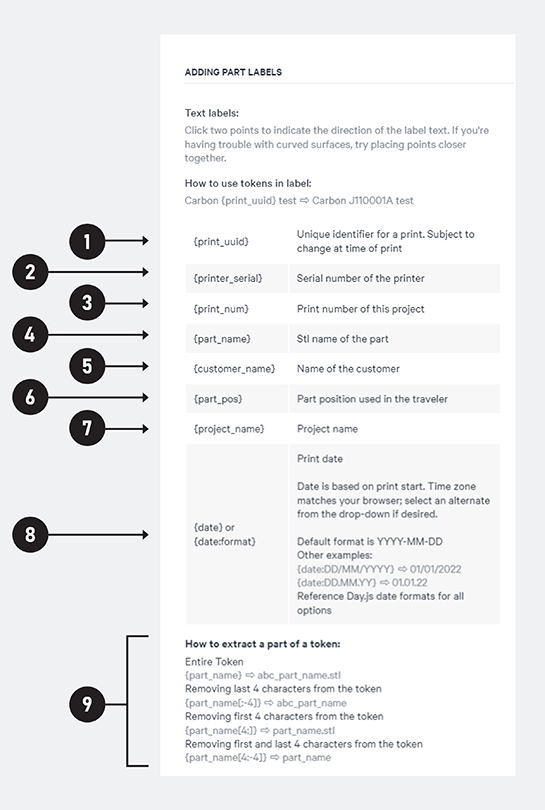
Click the **?** next to **Add Part Labels** to pull up a key of all available tokens.

::::VerticalSplit{layout="middle"}
:::VerticalSplitItem
:::
:::VerticalSplitItem
Click on the token name below to learn what each token can do.
:::
::::
:::::::WorkflowBlock
::::::WorkflowBlockItem
:::::ExpandableHeading
**\{print\_uuid}**
::::VerticalSplit{layout="middle"}
:::VerticalSplitItem
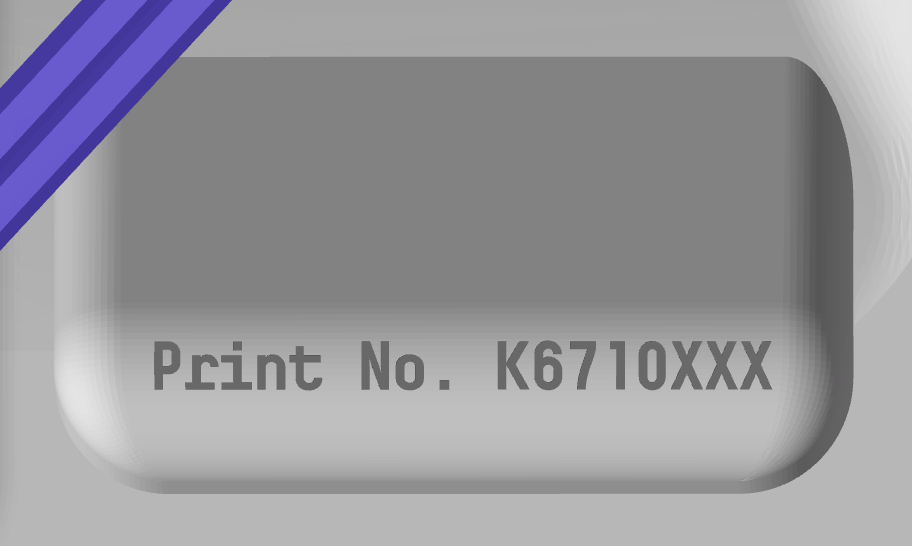
The unique identifier provides a unique number to each print.
This example used the label text:
**Print No. \{print\_uuid}**
The number represented in the UI is an approximation of the final number, which will vary every time the project is printed.
To track the final numbers printed, export the CSV from [Fleet Prints](docId:91X-qyIpcgNgDxmb1ktJ7) on your dashboard or from the Prints tab on the printer.
:::
:::VerticalSplitItem
:::
::::
:::::
::::::
::::::WorkflowBlockItem
:::::ExpandableHeading
**\{printer\_serial}**
::::VerticalSplit{layout="middle"}
:::VerticalSplitItem
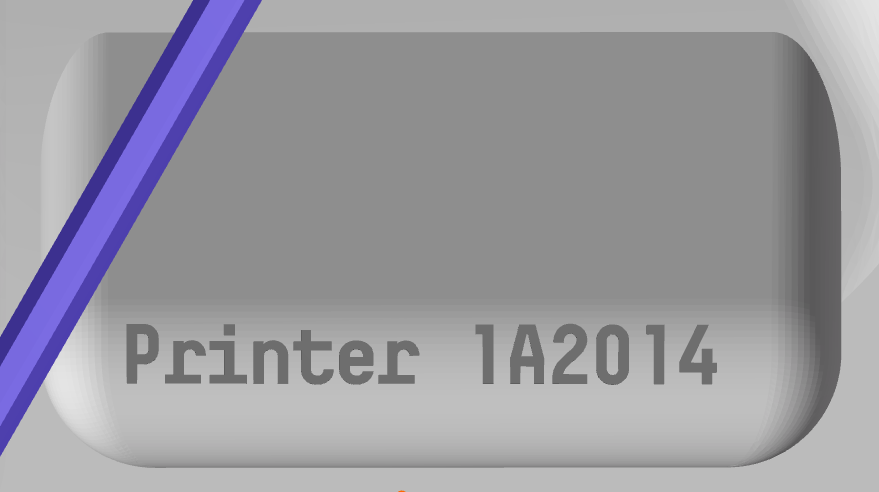
The **serial number **of the **printer **can be tracked directly on the part with this token.
This example used the label text:
**Printer \{printer\_serial}**
:::
:::VerticalSplitItem
:::
::::
:::::
::::::
::::::WorkflowBlockItem
:::::ExpandableHeading
**\{print\_num}**
::::VerticalSplit{layout="left"}
:::VerticalSplitItem
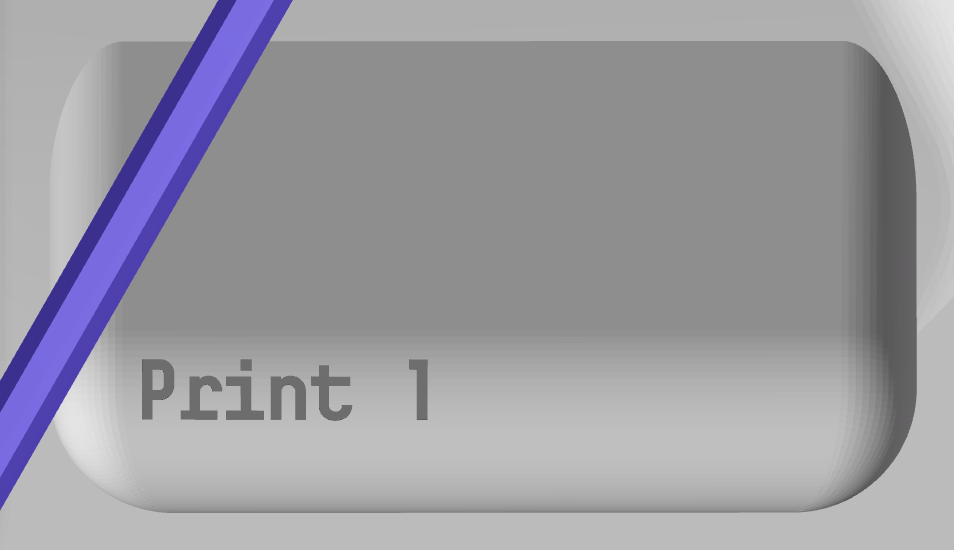
Track which **print number **this part came from.
This example used the label text:
**Print \{print\_num}**
:::
:::VerticalSplitItem
:::
::::
:::::
::::::
::::::WorkflowBlockItem
:::::ExpandableHeading
**\{part\_name}**
::::VerticalSplit{layout="middle"}
:::VerticalSplitItem
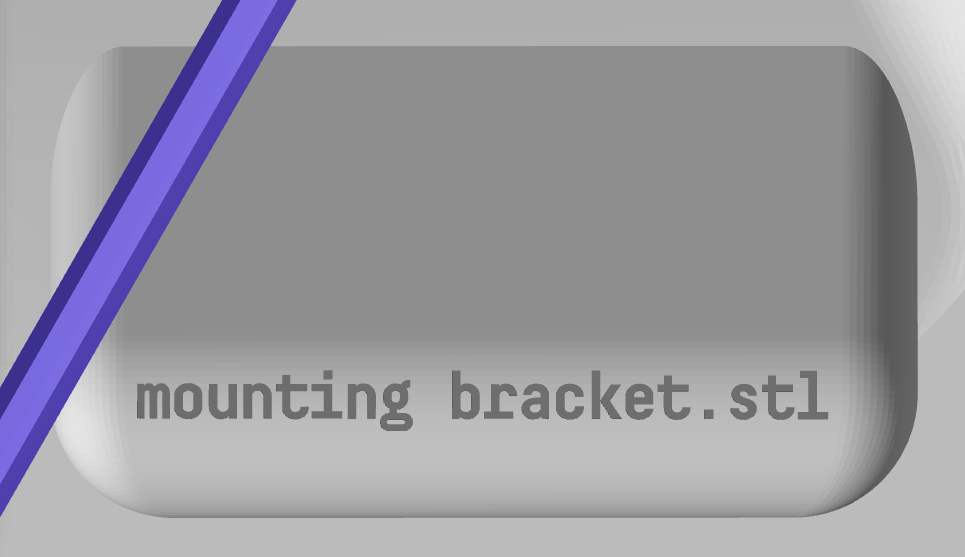
The **part name** reflects the name of the uploaded stl model.
This example used the label text:
**\{part\_name}**
**💡 **This token can be incredibly useful when printing bespoke parts.
For example, when printing dental models, the patient ID can be in the part name and recorded on the part.
:::
:::VerticalSplitItem
:::
::::
:::::
::::::
::::::WorkflowBlockItem
:::::ExpandableHeading
**\{customer\_name}**
::::VerticalSplit{layout="left"}
:::VerticalSplitItem
This is **your** company name should you choose to reflect your brand.
This example used the label text:
**\{customer\_name}**
:::
:::VerticalSplitItem

:::
::::
:::::
::::::
::::::WorkflowBlockItem
:::::ExpandableHeading
**\{part\_pos}**
::::VerticalSplit{layout="middle"}
:::VerticalSplitItem
Track where this part was placed on the build platform.
This example used the label text:
**Part Position \{part\_pos}**
**💡** Use this information with the **Traveler PDF** as a key to the numbered part position.
:::
:::VerticalSplitItem

:::
::::
:::::
::::::
::::::WorkflowBlockItem
:::::ExpandableHeading
**\{project\_name}**
::::VerticalSplit{layout="middle"}
:::VerticalSplitItem
Document the name of your project on the part with this token.
:::
:::VerticalSplitItem

:::
::::
:::::
::::::
::::WorkflowBlockItem
:::ExpandableHeading
**\{date} or \{date\:format}**
Date-based labels can be printed directly on the part with this token.
- Applies the date at the time of printing \*
- Default format YY-MM-DD
- Format is customizable - reference [day.js](https://day.js.org/) for all available options
- Preview available for the current date (and time if used)
- Time zone can be edited, defaults to browser setting
This example used the label text:
**\{date} **and** \{date\:YYYY-MM-DD h\:ma}**
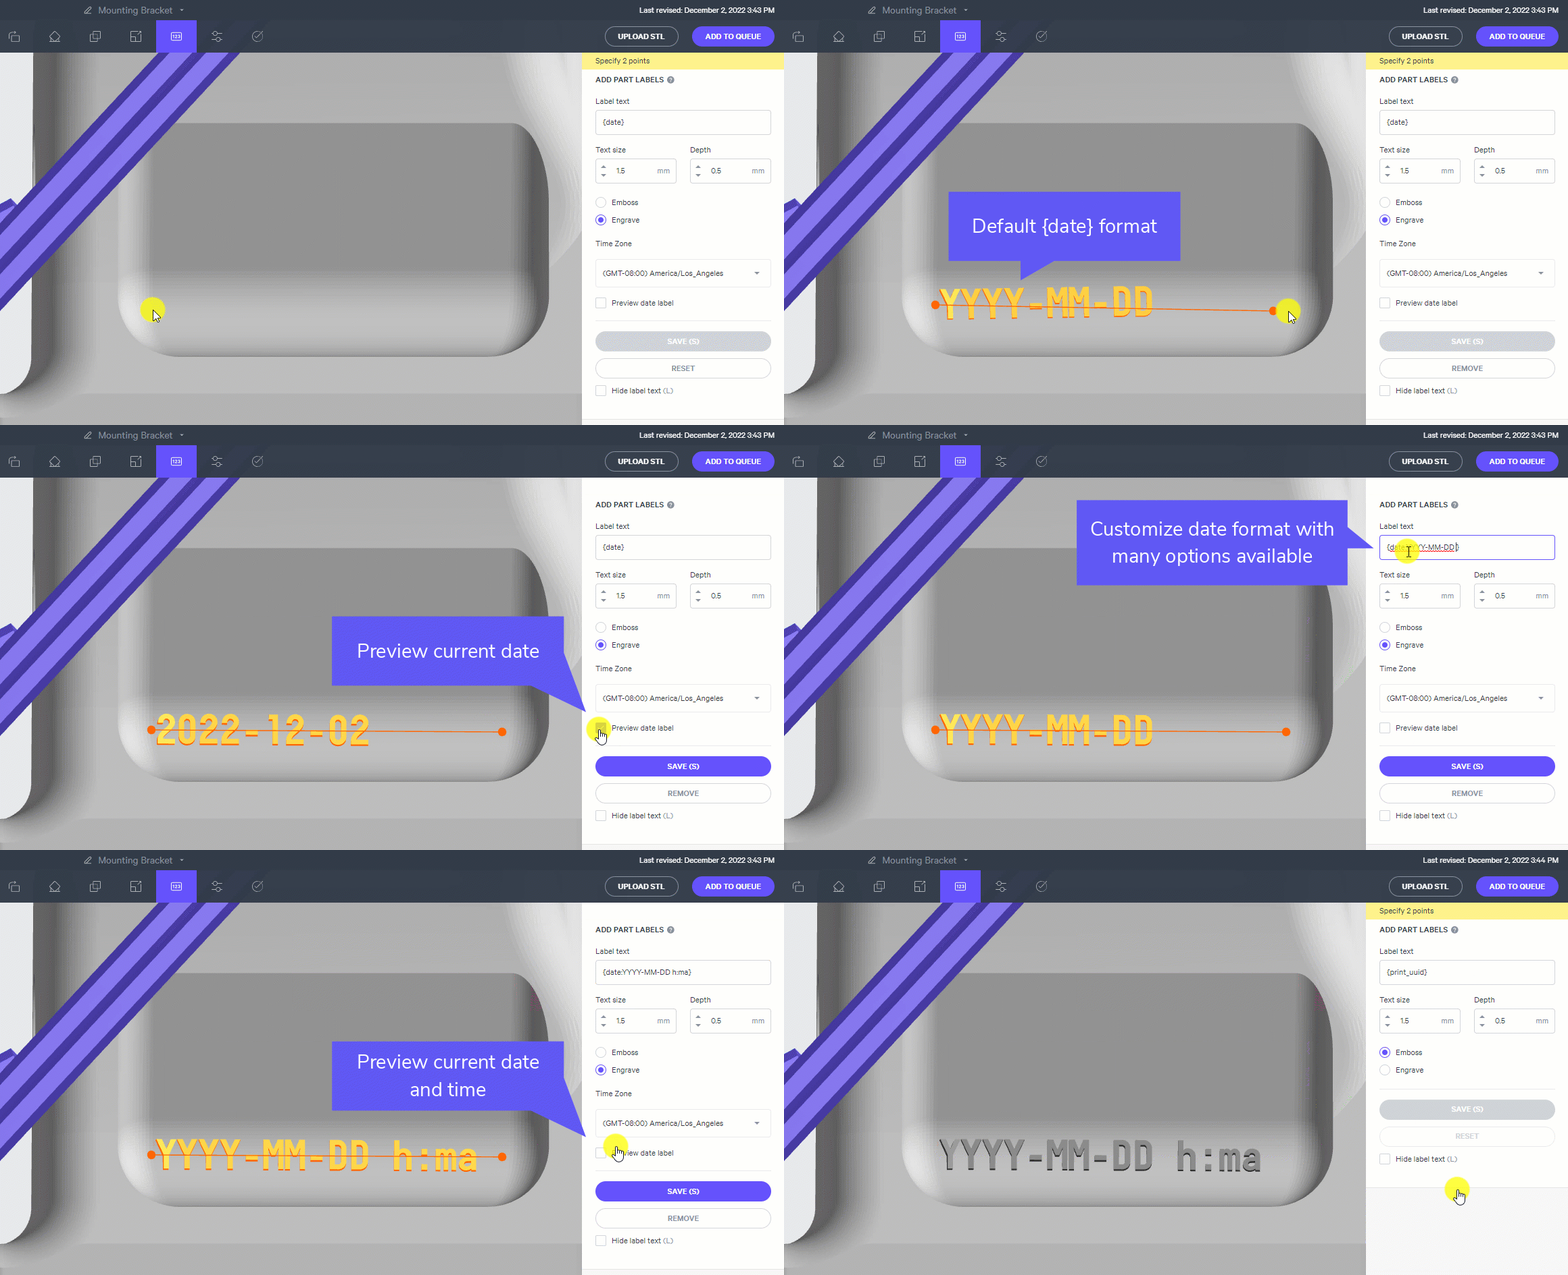
*\* The date and time matches the moment a user starts the print. Every time the users starts subsequent prints, the date will be adjusted accordingly. The exception is when using the **Reprint** functionality, which represents a frozen print state and will repeat the original print exactly. Reference *[Fleet Management](docId:91X-qyIpcgNgDxmb1ktJ7)* for more information on adding prints to queues.*
:::
::::
::::::WorkflowBlockItem
:::::ExpandableHeading
**How to extract a part of a token**
::::VerticalSplit{layout="middle"}
:::VerticalSplitItem
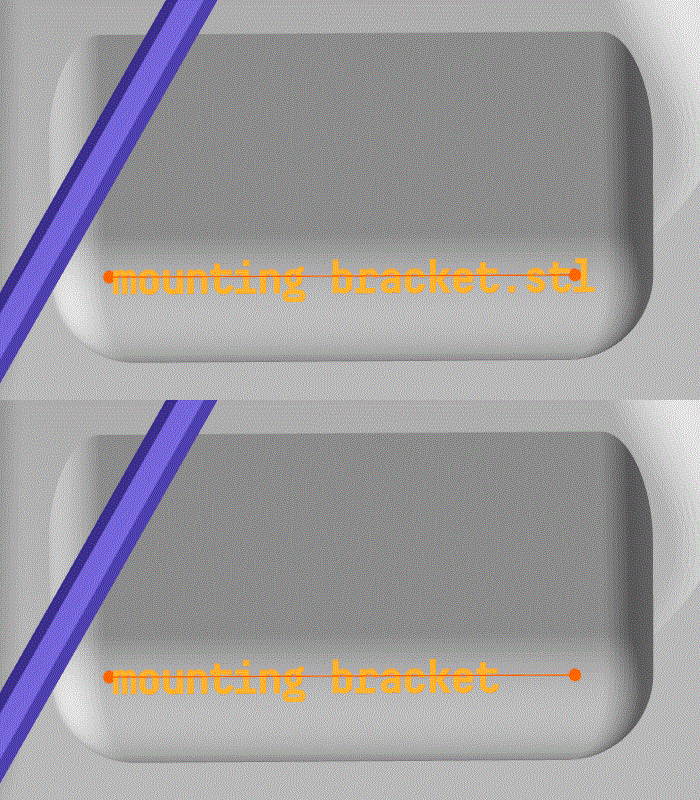
It may be helpful when using the name-based tokens to use only a portion of the name.
Use the instructions provided to remove characters at the beginning and/or end of the name.
This example used this label text to remove **.stl** from the name:
**\{part\_name\[:-4]}**
:::
:::VerticalSplitItem
:::
::::
::::VerticalSplit{layout="middle"}
:::VerticalSplitItem
**💡 **This token can be incredibly useful when printing bespoke parts.
For example, when printing dental models, the patient ID can be in the part name but you may want to remove extra information.
:::
:::VerticalSplitItem
*For example:*
**upper-denture\_patient-abc123.stl**
could be shortened to just the patient ID **abc123 **with label text:
**\{part\_name\[22:-4]}**
:::
::::
:::::
::::::
:::::::
# Traveler PDF
When using the** \{part\_pos}** token, it is helpful to download the Traveler PDF which provides a **keyed layout **of the build with the **position number** of each part.
:::hint{type="info"}
Note that the part position number is automatically generated with the `{part_pos}` token and cannot be manually renumbered.
:::
::::VerticalSplit{layout="middle"}
:::VerticalSplitItem
Build layout with part position numbers using the \{part\_pos} token
:::
:::VerticalSplitItem

:::
::::
::::VerticalSplit{layout="middle"}
:::VerticalSplitItem
Download Traveler PDF from Project Settings
:::
:::VerticalSplitItem

:::
::::
::::VerticalSplit{layout="middle"}
:::VerticalSplitItem
Example Traveler PDF
:::
:::VerticalSplitItem

:::
::::
# Text as Holes
::::VerticalSplit{layout="middle"}
:::VerticalSplitItem

:::
:::VerticalSplitItem
**Bullet Point Engraved at Full Depth**
💡 A quick way to add a hole to a part is to use engraved part labels. This can be used to add a new feature, to provide venting, or to provide drainage for resin.
- Use a **bullet point **(or character of your choosing)
- Set the **depth slightly larger than part thickness**
- Set to **Engrave**
:::
::::