---
title: SprintRay OnX Tough 2
slug: materials/sprintray-onx-tough-2
docTags:
createdAt: 2024-07-31T18:57:35.010Z
---
# Overview
::::VerticalSplit{layout="middle"}
:::VerticalSplitItem
**SprintRay™ OnX Tough 2 **resin is now available for Carbon M-Series printers in the U.S., ideal for creating durable, aesthetically pleasing fixed hybrid dentures and implant-retained prostheses. This innovative material features advanced NanoFusion™ technology, ensuring high fracture toughness and lifelike aesthetics. OnX Tough 2 exemplifies SprintRay and Carbon's dedication to advancing digital dentistry.
- **Natural Aesthetics:** Provides natural-looking enamel shades for aesthetically superior fixed hybrid dentures and prostheses.
- **Superior Durability:** A nano-ceramic hybrid material brings superior strength, with a work of fracture >1000 J/m² and fracture toughness of 2.62 MPa.m1/2
- **FDA Clearance:** OnX Tough 2 is the only 3D printing resin FDA-cleared for fixed hybrid dentures and implant-retained prostheses, merging the accuracy, consistency, and reliability of Carbon printers, allowing labs to produce highly realistic and durable dental restorations
:::
:::VerticalSplitItem

:::
::::
Choose Sprintray OnX Tough 2 for your fixed hybrid dentures, and experience what Carbon reliability with industry-leading material can help you deliver to your clinicians.
OnX Tough 2 is available for the following indications:
- Hybrid denture prosthetics
- Implant-supported denture prosthetics
- Monolithic full and partial removable dentures
- Preformed denture teeth to be used in a denture
:::hint{type="info"}
This resin is not currently compatible with the [AO Polishing Cassette](docId\:iFFh3q8-WLk-LIqr87bd5).
:::
## Resource Links
::::LinkArray
:::LinkArrayItem{headerType="IMAGE" headerImage="https://api.archbee.com/api/optimize/uXbZOKjJTGpPhjapQ8fvM-IOQIJkNnkbUAw9Q-ap1FV-20241115-235121.jpg"}
[About the Material](https://www.carbon3d.com/materials/onx-tough-2)
:::
:::LinkArrayItem{headerType="IMAGE" headerImage="https://api.archbee.com/api/optimize/3CesIL2dYMCHPZvRjp8S0/cJAKqDDnRUAeJAXNRThMm-20251016-221334.png"}
[Manufacturer Instructions for Use](https://sprintray.com/oracle/uploads/2023/12/IFU-020_4-SprintRay-OnX-Tough-2-IFU.pdf)
:::
:::LinkArrayItem{headerType="IMAGE" headerImage="https://api.archbee.com/api/optimize/3CesIL2dYMCHPZvRjp8S0/1r3fpdvMUMFVZGfey2Tjn-20251016-221405.jpg"}
[Safety Data Sheet](https://support.sprintray.com/s/materials/material-usage-documentation)
*Select the appropriate region and resin.*
:::
::::
## Protocol
This downloadable handout provides important usage information, including instructions about storage and post-processing. Print it out and bring it into the lab!
::File{src="https://api.archbee.com/api/presign/uXbZOKjJTGpPhjapQ8fvM-iWb4qcr8mT76mjPOHNoEo-20250107-205408.pdf" label="Sprintray OnX Tough 2 v01.00.pdf"}
## Dental Post-Processing Grids
::::VerticalSplit{layout="right"}
:::VerticalSplitItem
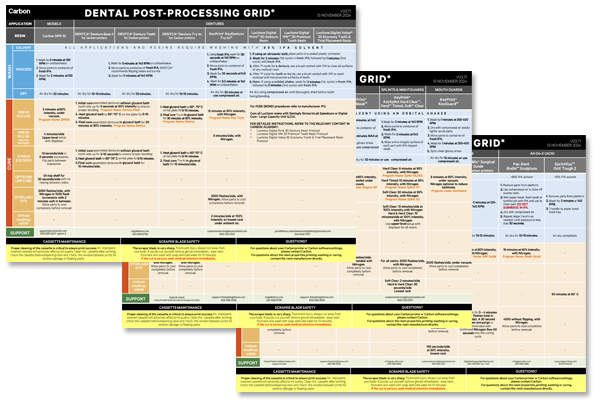
One of our most popular downloads! This table provides washing and curing instructions for all supported dental resins.
Print it and use it in the lab as a quick reference.
:::
:::VerticalSplitItem
:::
::::
::::VerticalSplit{layout="left"}
:::VerticalSplitItem
**English**
:::
:::VerticalSplitItem
::File{src="https://api.archbee.com/api/presign/3CesIL2dYMCHPZvRjp8S0/vQ2WsRger2d-CoLrn-m5f_dental-post-processing-grids-v0501.pdf" label="Dental-Post-Processing-Grids_v0501.pdf"}
:::
::::
::::VerticalSplit{layout="left"}
:::VerticalSplitItem
**German/Deutsch**
:::
:::VerticalSplitItem
::File{src="https://api.archbee.com/api/presign/uXbZOKjJTGpPhjapQ8fvM-seBSLAiWUzNDRI1GCLlop-20241125-214312.pdf" label="ZAHNÄRZTLICHES NACHBEARBEITUNGSGITTER v03.71 DE Deutsch.pdf"}
:::
::::
::::VerticalSplit{layout="left"}
:::VerticalSplitItem
**Spanish/Español**
:::
:::VerticalSplitItem
::File{src="https://api.archbee.com/api/presign/uXbZOKjJTGpPhjapQ8fvM-2i0UhzOfuA4aYJFusL1v2-20241203-180542.pdf" label="Rejilla de Posprocesamiento Dental v03.71 ES Espanol Spanish.pdf"}
:::
::::
## Resin Shades Available
Carbon has validated five shades of SprintRay OnX Tough 2 resin:
- A1
- A2
- B1
- Bleach
- Hollywood White
# General Orientation & Support Information
## Hide the Platform
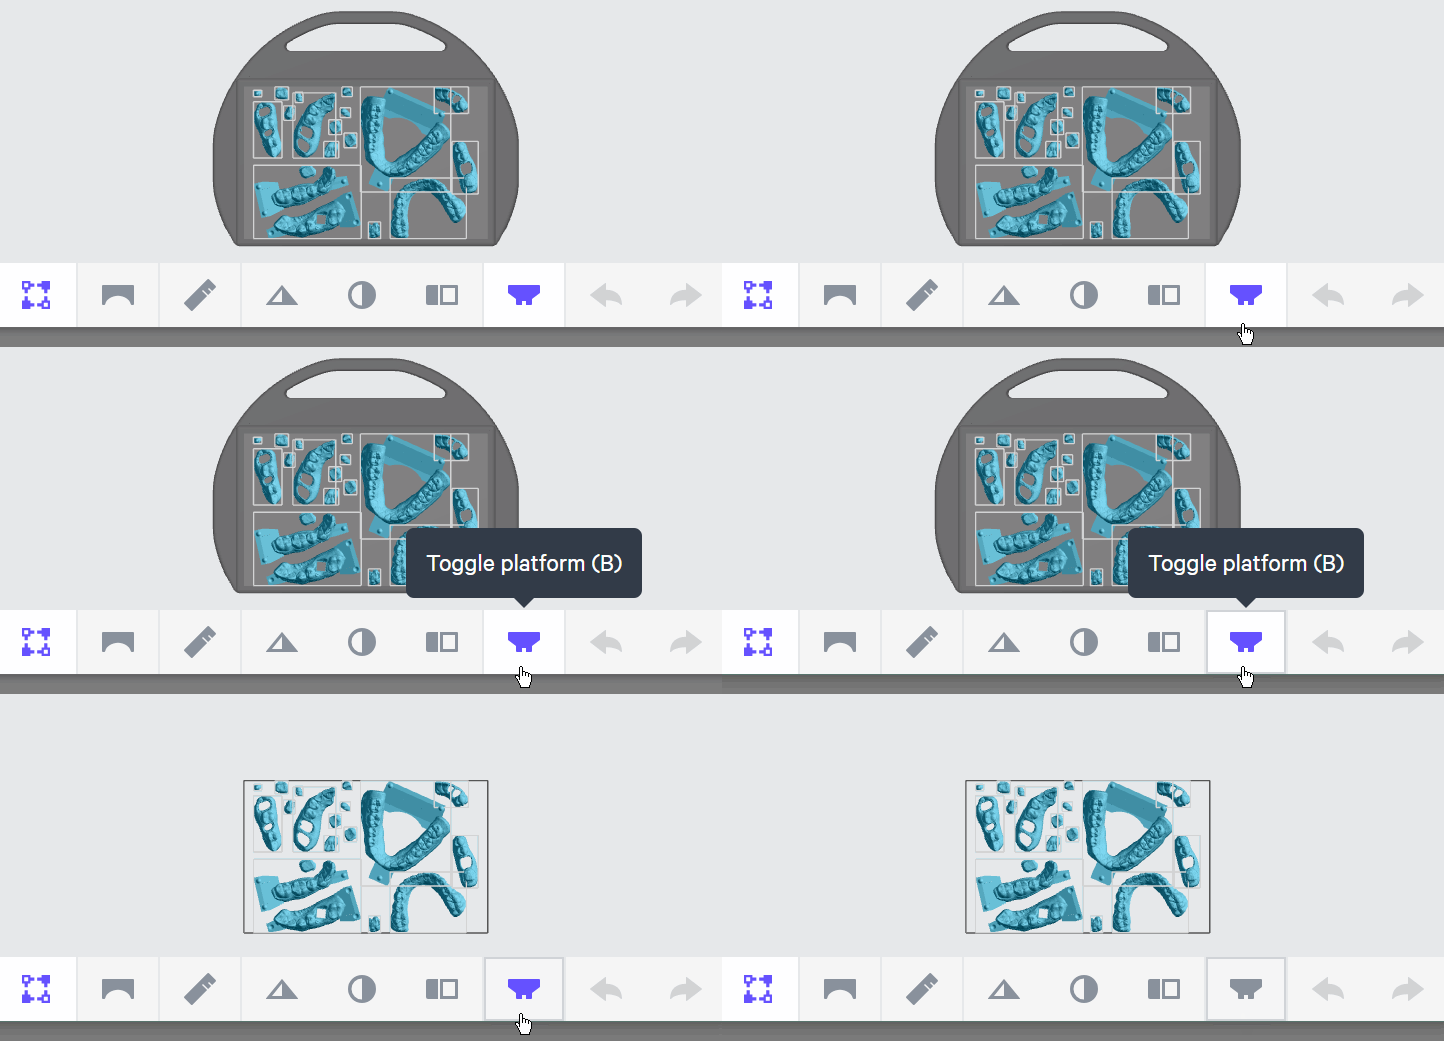
Use **Toggle platform** (or press **B**) to hide the platform before orienting parts. This will make it easier to see overhangs and place supports.
## Occlusal Surfaces Towards Platform
- Digital models should be oriented with the **occlusal surfaces facing the platform. **
- **Does not apply to try-ins or full-arch denture teeth.**
- Necessary to maintain accuracy.
- Ensures supports are on the occlusal surfaces enabling greater accuracy for mating surfaces.
::Image[]{src="https://api.archbee.com/api/optimize/3CesIL2dYMCHPZvRjp8S0/RHKPBY89K0yL0crEAOndz_image.png" size="70" width="1680" height="1085" position="flex-start" showCaption="false"}
- **Monolithic/try-in geometries **can be oriented **60 degrees** to **90 degrees**, where 90° is fully vertical with the anterior teeth facing the platform.
::Image[]{src="https://api.archbee.com/api/optimize/3CesIL2dYMCHPZvRjp8S0/tfPuZwSTQBVipHDM7trgJ_image.png" size="70" width="1680" height="1080" position="flex-start" showCaption="false"}
## No Overhangs on Interface
Orient parts so that **interfaces and margins are free from overhangs** and therefore do not require supports. Supports leave nubs which require more finishing and can affect fit with mating parts or teeth.

## Use Patch and Fence tools to create supports
::::VerticalSplit{layout="middle"}
:::VerticalSplitItem
### Patch tool
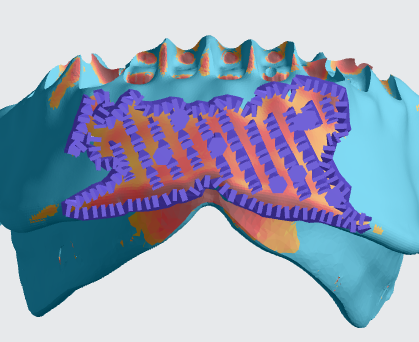
- The [Patch tool](docId\:VUbpoAitbLM11aM9-qJ1p) speeds up support creation by automatically supporting an area with just a few clicks. It is useful for supporting **larger areas** of overhang that would take longer to support manually.
- It is often useful to support your parts with this tool **before **manually adding supports.
::Image[]{src="https://res.cloudinary.com/carbon3d/image/upload/v1741914725/Education/Materials/dental/__General_Use/standard-support-menu-patch.png" size="50" width="208" height="73" position="flex-start" showCaption="false"}
:::
:::VerticalSplitItem
:::
::::
::::VerticalSplit{layout="middle"}
:::VerticalSplitItem
### Fence tool
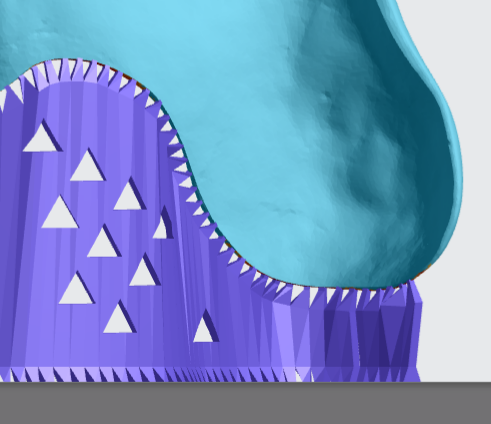
- [Fence supports](docId\:VUbpoAitbLM11aM9-qJ1p) are manually placed by the user and are best suited on **linear overhangs **or smaller areas.
- Fences provide stability while leaving smaller nubs than the default Bars option.
::Image[]{src="https://res.cloudinary.com/carbon3d/image/upload/v1741914724/Education/Materials/dental/__General_Use/standard-support-menu-fence.png" size="50" width="214" height="77" position="flex-start" showCaption="false"}
:::
:::VerticalSplitItem
:::
::::
:::hint{type="info"}
Review [Supports](docId\:VUbpoAitbLM11aM9-qJ1p) in [Printer UI](docId\:oId4ZNZtZYeltTPVJ984a) course for more information.
:::
# All-on-x (AOX)
:::hint{type="info"}
**The following information applies to full arches only.**
:::
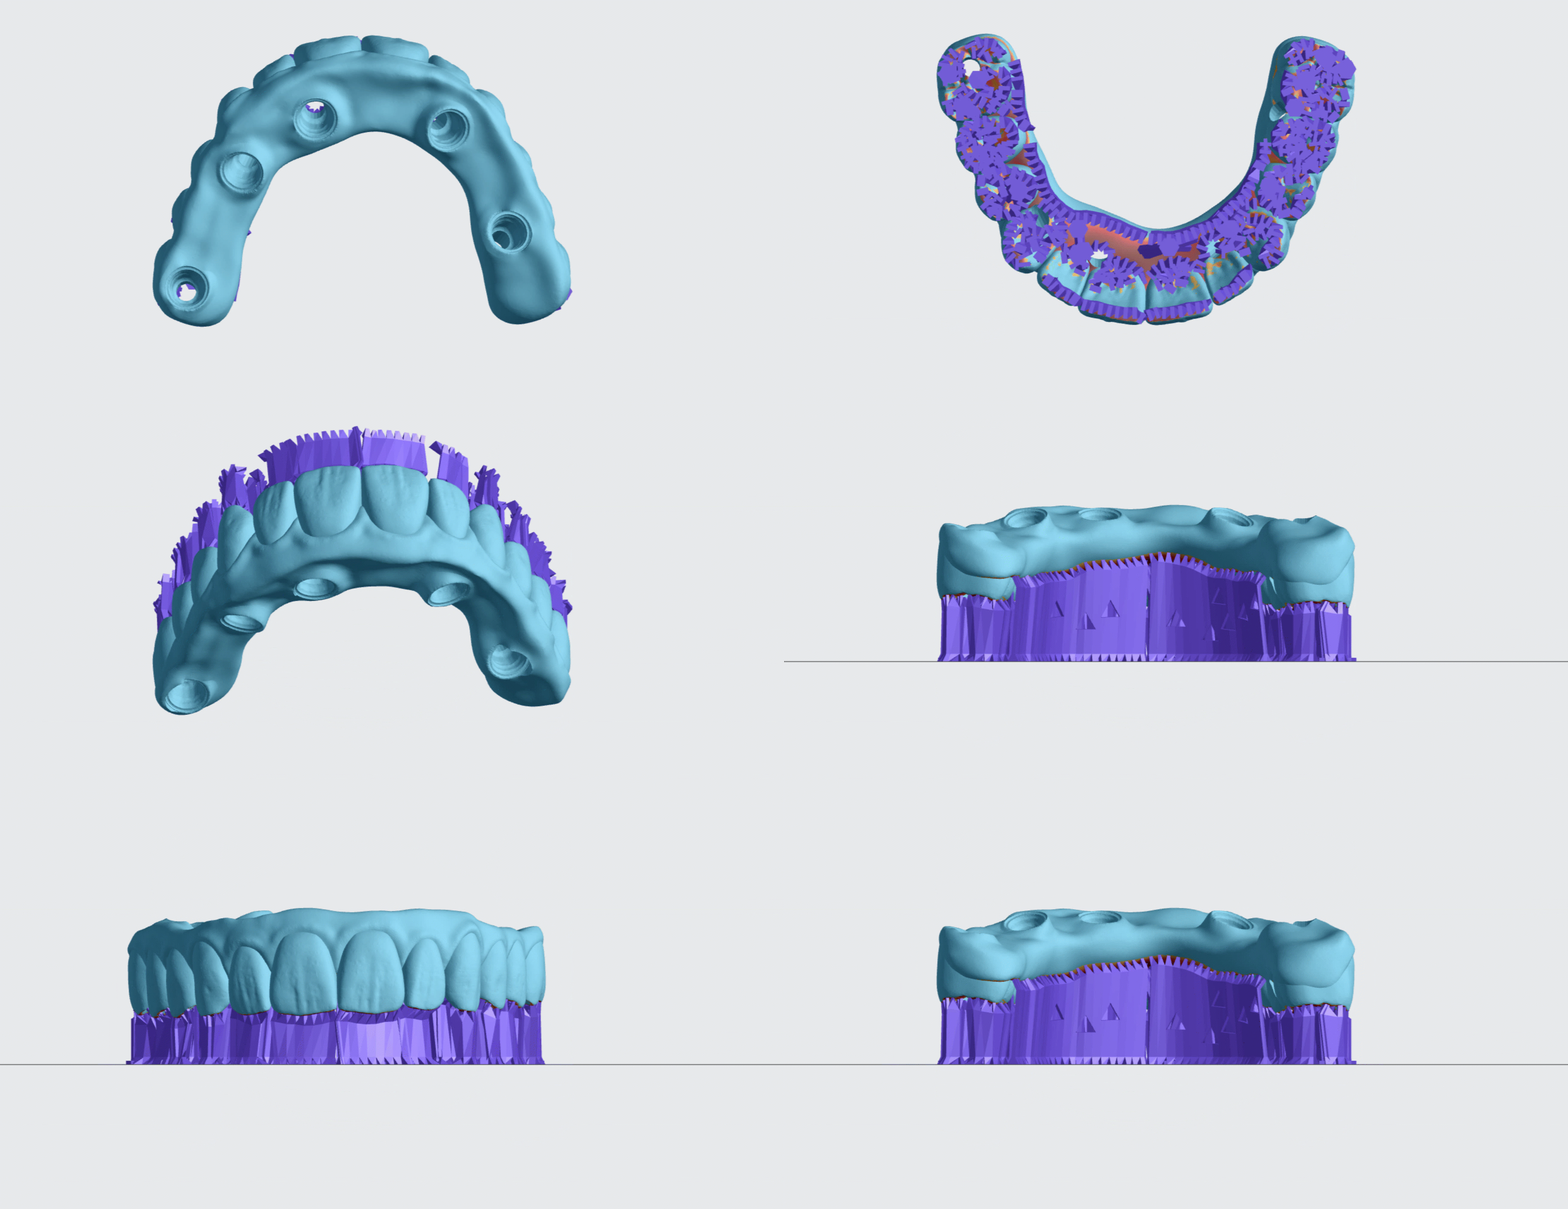
- AOX application should be oriented horizontally and require above platform supports.
## Orientation
::::VerticalSplit{layout="middle"}
:::VerticalSplitItem
1\. Click on **Orient** or **Shift + O** in the top bar in the printer interface.
2\. In the lower right corner of the bottom bar, turn on **Overhang Detection** or **V key** and set to** 40-60 degrees. **Areas that need support will appear **red****.**
:::
:::VerticalSplitItem

:::
::::
::::VerticalSplit{layout="middle"}
:::VerticalSplitItem
3\. Orient the occlusal surfaces **facing down, parallel **to the platform.
:::
:::VerticalSplitItem

:::
::::
:::hint{type="info"}
**Surfaces that have overhangs will require supports. **These supports affect fit and will require finishing to ensure proper seating.
:::
## Supporting
Follow the application specific recommendations below.
- Support all overhangs as needed using the Patch or Fence tools.
- In most cases, Patch is the only tool that will be required.
::embed[]{url="https://player.vimeo.com/video/889294857?dnt=1"}
:::hint{type="info"}
Review [Supports](docId\:VUbpoAitbLM11aM9-qJ1p) in [Printer UI](docId\:oId4ZNZtZYeltTPVJ984a) course for more information.
:::
### Example of Well-Supported AOX
# Crowns, Bridges and Veneers
Crowns, veneers and bridges have similar requirements.
- No overhangs on margins.
- No overhangs on interface surfaces.
- Minimum overhangs on buccal/lingual surfaces.

## Orientation
::::VerticalSplit{layout="middle"}
:::VerticalSplitItem
1\. Click on **Orient** or **Shift + O** in the top bar in the printer interface.
2\. In the lower right corner of the bottom bar, turn on **Overhang Detection** or **V key** and set to** 40-60 degrees. **Areas that need support will appear **red****.**
:::
:::VerticalSplitItem

:::
::::
3\. Orient each part so that the margin and interface are **free of overhangs**.
4\. Refine orientation to **minimize overhangs** on other surfaces.
The margin and interface of each part should now be free of overhangs. The remaining surfaces should have a minimal amount of overhangs.

:::hint{type="warning"}
**Margins and interfaces that have overhangs will require supports. These supports affect fit and will require finishing to ensure proper seating.**
:::
## Supporting
Follow the application specific recommendations below.
- Support all overhangs as needed using the [patch](docId\:VUbpoAitbLM11aM9-qJ1p) or [fence](docId\:VUbpoAitbLM11aM9-qJ1p) tools.
:::hint{type="info"}
Review [Supports](docId\:VUbpoAitbLM11aM9-qJ1p) in [Printer UI](docId\:oId4ZNZtZYeltTPVJ984a) course for more information.
:::
### Incisors and canines
In addition to supporting overhangs, these teeth require additional supports to maximize accuracy and print success:
- **Secondary fence supports **offset to the **lingual side **of the incisal edge/cusp tip
- **Two rows of fences **on the **labial surface** located at approximately **1/4 and 3/4 of the tooth height**.
The example below shows the additional supports needed on a veneer for an incisor.
### Secondary fence on lingual side
::::VerticalSplit{layout="middle"}
:::VerticalSplitItem

1\. Support overhang at incisal edge with a single fence.
:::
:::VerticalSplitItem

2\. Add secondary fence approximately 1 mm to the lingual side.
:::
::::
::::VerticalSplit{layout="middle"}
:::VerticalSplitItem

3\. Generated supports.
:::
:::VerticalSplitItem

4\. Side view of generated supports.
:::
::::
### Two fences on the labial surface
::::VerticalSplit{layout="middle"}
:::VerticalSplitItem

1\. Labial surface of veneer for incisor.
:::
:::VerticalSplitItem

2\. Add fences approximately 1/4 and 3/4 of the tooth height.
:::
::::
::::VerticalSplit{layout="middle"}
:::VerticalSplitItem

3\. Generated supports.
:::
:::VerticalSplitItem

4\. Side view of generated supports.
:::
::::
### Examples of well-supported parts
::::VerticalSplit{layout="middle"}
:::VerticalSplitItem
**Crown**

:::
:::VerticalSplitItem
**Veneer**

:::
::::
::::VerticalSplit{layout="middle"}
:::VerticalSplitItem
**Bridge**

:::
:::VerticalSplitItem
:::
::::
# Denture Try-ins
:::hint{type="info"}
**The following information applies to upper and lower denture try-ins.**
:::
Denture try-ins have the following general requirements:
- Orient try-ins with anterior facing platform.
- Minimize overhangs on intaglio surfaces.
- No overhangs on occlusal tooth surfaces.
## Orientation
::::VerticalSplit{layout="middle"}
:::VerticalSplitItem
1\. Click on **Orient** or **Shift + O** in the top bar in the printer interface.
2\. In the lower right corner of the bottom bar, turn on **Overhang Detection** or **V key** and set to** 40-60 degrees. **Areas that need support will appear **red****.**
:::
:::VerticalSplitItem

:::
::::
:::::VerticalSplit{layout="middle"}
::::VerticalSplitItem
3\. Orient the occlusal surfaces roughly parallel to the platform.
4\. Rotate model so the occlusal surfaces are **90 degrees to occlusal side.**
:::hint{type="info"}
**There will be overhangs on molars and labial surfaces.**
:::
::::
:::VerticalSplitItem

:::
:::::
:::hint{type="warning"}
**Surfaces that have overhangs will require supports. These supports affect fit and will require finishing to ensure proper seating.**
:::
## Supporting
Follow the application specific recommendations below.
- Support all overhangs as needed using the Patch or Fence tools.
- In most cases, Patch is the only tool that will be required.
- When using Patch tool, set **Fence spacing to 2 mm.**
- If redundant bar supports are added, they may be manually deleted.
- Don't forget to support T-bars and the inner edge.
### Anterior labial surfaces
::embed[]{url="https://player.vimeo.com/video/888827703?dnt=1"}
:::hint{type="info"}
**Review **[Supports](docId\:VUbpoAitbLM11aM9-qJ1p)** in **[Printer UI](docId\:oId4ZNZtZYeltTPVJ984a)** course for more information.**
:::
### T-bars
T-bars also require supports.
- **Use fence supports **to quickly support T-bars.
- Press **ESC **key to end a fence.
::embed[]{url="https://player.vimeo.com/video/889170860?dnt=1"}
### Inner lingual edge of lower try-in
Typically, only a single fence is needed to support the lingual edge.

## Example of well-supported try-ins
::::VerticalSplit{layout="middle"}
:::VerticalSplitItem

:::
:::VerticalSplitItem

:::
::::
# Denture Teeth - Full Arches
:::hint{type="info"}
**The following information applies to full arches only.**
:::
- Unlike other applications, denture teeth require placement of supports on basal surfaces.
- No overhangs on occlusal tooth surfaces.
## Orientation
::::VerticalSplit{layout="middle"}
:::VerticalSplitItem
1\. Click on **Orient** or **Shift + O** in the top bar in the printer interface.
2\. In the lower right corner of the bottom bar, turn on **Overhang Detection** or **V key** and set to** 40-60 degrees. **Areas that need support will appear **red****.**
:::
:::VerticalSplitItem

:::
::::
::::VerticalSplit{layout="middle"}
:::VerticalSplitItem
3\. Orient the occlusal surfaces **facing up**, **parallel **to the platform.
4\. Rotate **30 degrees** up to lingual side.
:::
:::VerticalSplitItem

:::
::::
:::hint{type="info"}
**Surfaces that have overhangs will require supports. ** These supports affect fit and will require finishing to ensure proper seating.
:::
## Supporting
Follow the application specific recommendations below.
- Support all overhangs as needed using the Patch or Fence tools.
- In most cases, Patch is the only tool that will be required.
- Limit supports to basal surfaces.
::embed[]{url="https://player.vimeo.com/video/841963636?dnt=1"}
:::hint{type="info"}
**Review **[Supports](docId\:VUbpoAitbLM11aM9-qJ1p)** in **[Printer UI](docId\:oId4ZNZtZYeltTPVJ984a)** course for more information.**
:::
### Example of well-supported full arch

# Nesting

::::VerticalSplit{layout="right"}
:::VerticalSplitItem
1. Select the **Layout tab**** (Shift + L)** in the top menu bar.
2. Under **Auto Layout,** select **Gen2.**
- Gen2 usually gives the most effecient packing for dental devices.
3. Enter at least **1 mm** in **Padding.**
- Models require a minimum of 1 mm of space between them.
4. Leave **Optimize starting rotation** unchecked.
- This leaves your parts in their previous orientations.
5. Leave **Allowed rotations** at the default setting.
- This gives the software maximum flexibility to fit the most possible parts on the build platform.
6. Press the **Auto Layout** button to arrange your parts.
:::
:::VerticalSplitItem

:::
::::
If necessary, nesting can be changed manually:
- Click and drag parts to adjust their position.
- Modify Z rotation by using the **Spin **tool or manual rotations under the **Orient tab** **(Shift + O).**
- Use the **Part List tab **as needed to more easily select models and focus on them.
# Print Preparation
## Print Controls
Click **Print Controls** or **Shift + P** in the top menu bar.

## Slicing
::::VerticalSplit{layout="middle"}
:::VerticalSplitItem
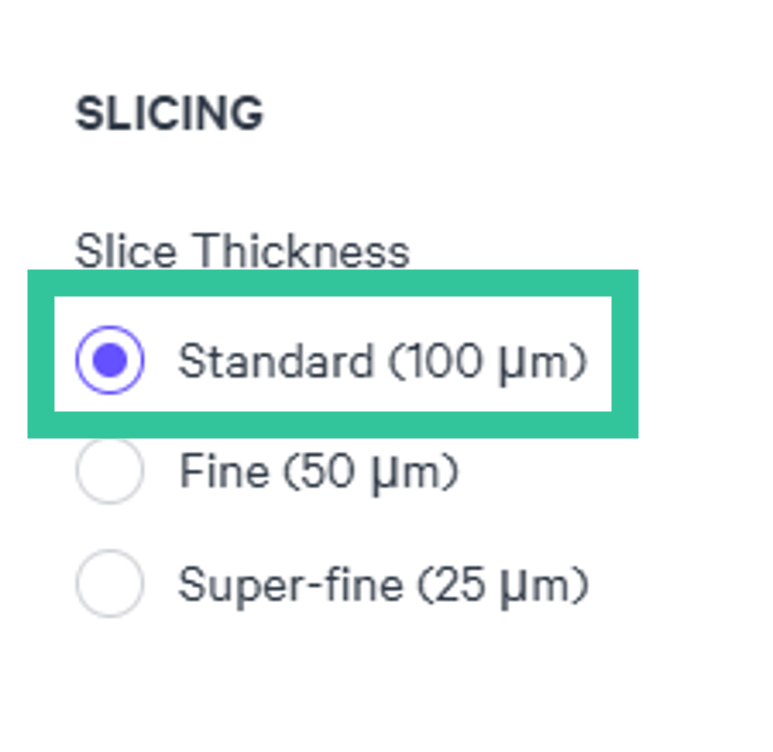
- Slice Thickness should be **Standard (100 µ)**.
- **Reducing the slice thickness by choosing the Fine (50 µ) or Super-fine (25 µ) settings will increase print time and may reduce part quality and accuracy.**
:::
:::VerticalSplitItem
:::
::::
## Project Analysis
1. Select the **Project Analysis** tab.
2. Click **Start Analysis** and wait for the processing to complete.
- Note the required resin volume and print time.
3. Click **Add to Queue.**

# Manufacturer Instructions for Use
Consult the manufacturer IFU for dispensing, printing, washing, curing, bonding and finishing information.
::::LinkArray
:::LinkArrayItem{headerType="IMAGE" headerImage="https://api.archbee.com/api/optimize/3CesIL2dYMCHPZvRjp8S0/cJAKqDDnRUAeJAXNRThMm-20251016-221334.png"}
[Manufacturer Instructions for Use ](https://sprintray.com/oracle/uploads/2023/12/IFU-020_4-SprintRay-OnX-Tough-2-IFU.pdf)
:::
::::
# Questions & Support
**For questions about the resin properties, printing, washing or curing your parts, please contact the SprintRay support team:**
- Phone: (800) 914-8004
- Email: support\@sprintray.com
For questions about your **Carbon printer** or **Carbon software settings** used for this resin, please [contact Carbon](https://learn.carbon3d.com/carbon-support):
- Email: [support@carbon3d.com](mailto\:support@carbon3d.com)
- Phone:
- **U.S. and Canada** 1-650-285-6307 option 2
- **Germany** +49 6102 5790849
- **UK **+44 (0) 2082 647484
- Printer UI: On the dashboard, select the **Prints** tab. **Select one of the printed projects.** Click **Request Help** in the lower right corner.
::Image[]{src="https://api.archbee.com/api/optimize/3CesIL2dYMCHPZvRjp8S0/YY6yCChSIB8SevmBwY76W_request-help-01.png" size="70" width="6541" height="3371" position="flex-start" alt="Location of button in the printer software" showCaption="false"}