---
title: Desktop Health SmileGuard
slug: materials/desktop-health-smileguard
description: Unlock the potential of Desktop Health's SmileGuard light-curable resin with our comprehensive course designed for Carbon printers. Learn how to prepare digital designs for optimal splint and night guard production.
docTags:
createdAt: 2024-05-22T17:25:43.814Z
---
# Overview
**Desktop Health™ SmileGuard™ for Carbon® printers **is now available to produce splints and night guards. Offering the perfect blend of strength and comfort, this breakthrough light-curable resin formulation delivers stunning clarity and superior quality with optimal strength and shape retention for durable protection coupled with soft flexibility for a comfortable and perfect fit.
::Image[]{src="https://api.archbee.com/api/optimize/3CesIL2dYMCHPZvRjp8S0/4ZmhxSi05zijIKpSDaZ2G_image.png" size="60" width="1196" height="747" position="flex-start" alt="Splint" showCaption="false"}
This course will cover digital prep of your splints and night guards to properly prepare them for printing.
:::hint{type="success"}
This resin is compatible with the [AO Polishing Cassette](docId\:iFFh3q8-WLk-LIqr87bd5).
:::
## Resource Links
::::LinkArray
:::LinkArrayItem{headerType="IMAGE" headerImage="https://api.archbee.com/api/optimize/uXbZOKjJTGpPhjapQ8fvM-IOQIJkNnkbUAw9Q-ap1FV-20241115-235121.jpg"}
[About the Material](https://www.carbon3d.com/materials/smileguard)
:::
:::LinkArrayItem{headerType="IMAGE" headerImage="https://api.archbee.com/api/optimize/3CesIL2dYMCHPZvRjp8S0/cJAKqDDnRUAeJAXNRThMm-20251016-221334.png"}
[Instructions for Use](https://knowledge.desktophealth.com/hc/en-us/articles/9307593090967-SmileGuard-Instructions-for-Use)
:::
:::LinkArrayItem{headerType="IMAGE" headerImage="https://api.archbee.com/api/optimize/3CesIL2dYMCHPZvRjp8S0/1r3fpdvMUMFVZGfey2Tjn-20251016-221405.jpg"}
[Safety Data Sheet](https://knowledge.desktophealth.com/hc/en-us/articles/9307492350487-SmileGuard-Safety-Data-Sheet)
:::
::::
## Protocol
This downloadable handout provides important usage information, including instructions about storage and post-processing. Print it out and bring it into the lab!
::File{src="https://api.archbee.com/api/presign/3CesIL2dYMCHPZvRjp8S0/lLzcPeX8yFhNS1NK_wO6F_desktop-health-smileguard-protocol-v0100.pdf" label="Desktop Health Smileguard Protocol v01.00.pdf"}
## Dental Post-Processing Grids
::::VerticalSplit{layout="right"}
:::VerticalSplitItem
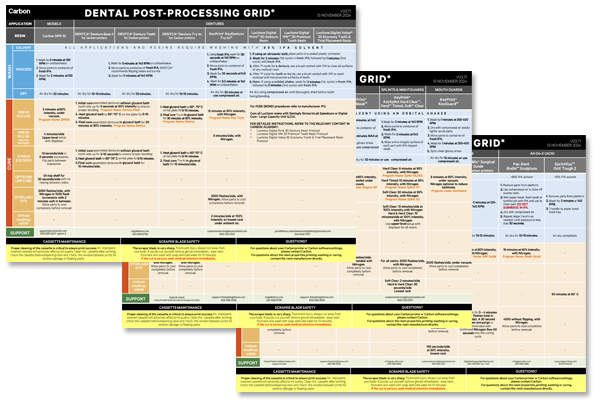
One of our most popular downloads! This table provides washing and curing instructions for all supported dental resins.
Print it and use it in the lab as a quick reference.
:::
:::VerticalSplitItem
:::
::::
::::VerticalSplit{layout="left"}
:::VerticalSplitItem
**English**
:::
:::VerticalSplitItem
::File{src="https://api.archbee.com/api/presign/3CesIL2dYMCHPZvRjp8S0/vQ2WsRger2d-CoLrn-m5f_dental-post-processing-grids-v0501.pdf" label="Dental-Post-Processing-Grids_v0501.pdf"}
:::
::::
::::VerticalSplit{layout="left"}
:::VerticalSplitItem
**German/Deutsch**
:::
:::VerticalSplitItem
::File{src="https://api.archbee.com/api/presign/uXbZOKjJTGpPhjapQ8fvM-seBSLAiWUzNDRI1GCLlop-20241125-214312.pdf" label="ZAHNÄRZTLICHES NACHBEARBEITUNGSGITTER v03.71 DE Deutsch.pdf"}
:::
::::
::::VerticalSplit{layout="left"}
:::VerticalSplitItem
**Spanish/Español**
:::
:::VerticalSplitItem
::File{src="https://api.archbee.com/api/presign/uXbZOKjJTGpPhjapQ8fvM-2i0UhzOfuA4aYJFusL1v2-20241203-180542.pdf" label="Rejilla de Posprocesamiento Dental v03.71 ES Espanol Spanish.pdf"}
:::
::::
## Resin menu options
Select the following option depending on which resin or cassette you are using\::
- **Desktop Health SmileGuard **
when using the standard C2 (M2) or D1 (M3/M3 Max) cassette.
- **AO-Polish Desktop Health SmileGuard** when using the AO Polishing Cassette (M2).
- The AO Polish workflow is only compatible with **vertically **oriented parts.
# Design Recommendations
- Carbon® does not make splint design recommendations.
- Carbon encourages users to follow the guidelines of your design software.
- Desktop Health™ has approved a wall thickness ranging from a **minimum of 2 mm to a** **maximum of 3 mm**.
- Single-sided splints are easily printed.
::Image[]{src="https://api.archbee.com/api/optimize/3CesIL2dYMCHPZvRjp8S0/WRzTour1S5WkMes7TvMNF_image.png" size="50" width="313" height="313" position="flex-start" caption="Single-sided splint" alt="Example splint model" showCaption="true"}
# Vertical Orientation and Support
Printing splints in a **vertical **orientation maximizes the amount of splints that can printed at once.
Splints can also be printed **horizontally**, which is shown in a later section. Carbon encourages experimenting with both methods to determine which best suits your lab's designs.
[Click here to jump to the horizontal orientation workflow below.](docId\:GfGLjvBz-0_kk3PDCl-Vd)
## Orienting
1\. Click on **Orient** or **Shift + O** in the top bar in the printer interface.
2\. In the lower right corner of the bottom bar, turn on **Overhang Detection** or **V key** and set to **40 degrees. **Areas that need support will appear **red.**
::Image[]{src="https://res.cloudinary.com/carbon3d/image/upload/Education/Materials/dental/__General_Use/Orient-toggle-platform-color01.png" size="70" width="1661" height="866" position="flex-start" alt="Orientation and Overhang Detection buttons" showCaption="false"}
3\. Orient the splints so they are **about parallel to the platform.**
4\. Rotate the models **90 degrees with the anteriors facing the platform.** The models should be standing vertically, perpendicular to the platform.
::Image[]{src="https://api.archbee.com/api/optimize/3CesIL2dYMCHPZvRjp8S0/9bEJZt7WseLEuCQfe2QNI_orientation-01-vertical.gif" size="70" width="1204" height="756" position="flex-start" alt="Orienting splint model" showCaption="false"}
:::hint{type="info"}
**Surfaces that have overhangs will require supports. **Surfaces with supports will require finishing to ensure proper seating.
:::
## Supporting
Supports hold up the part during printing. They do this by connecting platform-facing surfaces to the platform.
:::hint{type="info"}
Review [Supports](docId\:VUbpoAitbLM11aM9-qJ1p) in [Printer UI](docId\:oId4ZNZtZYeltTPVJ984a) course for more information.
:::
### Enter Support mode
1. Click **Support** in the dark gray bar at the top of screen.
2.
Under **Position**, select **Above Platform** to lift parts off the platform.
3. Click the **Manual tab** and make sure **Patch** is selected.

### Add supports
::embed[]{url="https://player.vimeo.com/video/919264620"}
1. Click on the anterior surface of a splint to select a patch.
2. Under the **Patch **tab, adjust the **Overhang **to between **40 and 60 degrees. **
1. Select a value to ensure that the patch covers the **six anterior teeth.**
3. In the **Primary Support Type **dropdown menu, select **Fence**. Fences are easier to remove and require less finishing than other support types.
4. Enter a **Spacing **value between **2.5 and 4 mm. **
5. Make sure the **Boundary Fence** checkbox is selected.
6. **Margin **value should be **0 mm.**
### Example of a well-supported splint
::Image[]{src="https://api.archbee.com/api/optimize/3CesIL2dYMCHPZvRjp8S0/KAqrdvuibpdnzoZ4sip6Z_keysplint-hard-well-supported-single-01-10fps-opt.gif" size="70" width="800" height="800" position="flex-start" alt="Supported splint" showCaption="false"}
# Horizontal Orientation and Support
## Orienting
1. Click on **Orient** or **Shift + O** in the top bar in the printer interface.
2. Orient the splint so that the **cameo surface is facing the platform.**
3. Adjust the splint so that it is **parallel with the platform.**
::Image[]{src="https://api.archbee.com/api/optimize/3CesIL2dYMCHPZvRjp8S0/jjJ9xPfXQpV1yEE-nbMTi_image.png" size="70" width="627" height="254" position="flex-start" caption="Orient button" alt="Orient button" showCaption="true"}
::Image[]{src="https://api.archbee.com/api/optimize/3CesIL2dYMCHPZvRjp8S0/bYgyrt3U7dtYv4hdgyl81_orientation-horizontal.gif" size="70" width="1452" height="816" position="flex-start" alt="Orienting splint horizontally" showCaption="false"}
## Supporting
Use **fences **to support your parts: They are easy to remove and do not increase the footprint of the splint, enabling more to be fit onto the build platform.
### Enter Support mode
1. Click **Support** in the dark gray bar at the top of screen.
2. Under **Position**, select **Above Platform** to lift parts off the platform.
3. Skip **Auto Support Method** as this mode is not recommended.
4. Click **Manually Add** to go to the Support editing interface.

### Add supports
::embed[]{url="https://player.vimeo.com/video/919475681"}
1. Click on the cameo surface of a splint to select a patch.
2. Under the **Patch **tab, adjust the **Overhang **to between **40 and 60 degrees. **
1. Select a value to ensure that the patch covers the splint.
3. In the **Primary Support Type **dropdown menu, select **Fence**. Fences are easier to remove and require less finishing than other support types.
4. Enter a **Spacing **value between **2.5 and 4 mm.**
5. Make sure the **Boundary Fence **checkbox is selected.
6. **Margin **value should be **0 mm.**
# Nesting

::::VerticalSplit{layout="right"}
:::VerticalSplitItem
1. Select the **Layout tab**** (Shift + L)** in the top menu bar.
2. Under **Auto Layout,** select **Gen2.**
- Gen2 usually gives the most effecient packing for dental devices.
3. Enter at least **1 mm** in **Padding.**
- Models require a minimum of 1 mm of space between them.
4. Leave **Optimize starting rotation** unchecked.
- This leaves your parts in their previous orientations.
5. Leave **Allowed rotations** at the default setting.
- This gives the software maximum flexibility to fit the most possible parts on the build platform.
6. Press the **Auto Layout** button to arrange your parts.
:::
:::VerticalSplitItem

:::
::::
If necessary, nesting can be changed manually:
- Click and drag parts to adjust their position.
- Modify Z rotation by using the **Spin **tool or manual rotations under the **Orient tab** **(Shift + O).**
- Use the **Part List tab **as needed to more easily select models and focus on them.
# Print Controls
Click **Print Controls** in the top menu bar.
Carbon recommends these settings to deliver the best results for splint models.
## Slicing
- Slice Thickness should be **Standard (100 µm)**
- **Fine (50 µm) slicing** has been validated with the **AO-Polishing (C4) cassette.** Reducing the slice thickness by selecting the Fine (50 µ) will not compromise part quality/accuracy, but it will increase print time.

# Manufacturer Instructions for Use
::::LinkArray
:::LinkArrayItem{headerType="IMAGE" headerImage="https://api.archbee.com/api/optimize/3CesIL2dYMCHPZvRjp8S0/cJAKqDDnRUAeJAXNRThMm-20251016-221334.png"}
[Instructions for Use](https://knowledge.desktophealth.com/hc/en-us/articles/9307593090967-SmileGuard-Instructions-for-Use)
:::
::::
# Post-Processing
:::hint{type="info"}
Please refer to the [Desktop Health™ IFU](https://knowledge.desktophealth.com/hc/en-us/articles/9307593090967-SmileGuard-Instructions-for-Use) for post-processing information.
:::
## Temporary yellowing with the Dreve PCU LED
- When curing SmileGuard™ resin parts using the **Dreve PCU LED,** a **yellow tint** is expected and normal.
- Yellowing does not occur when using the Otoflash G171.
- The yellowish tint will **typically fade away within 1 - 3 days.**
- If after this time period you are still experiencing issues with discoloration, please contact Carbon Support with a detailed description of the issue.
::Image[]{src="https://api.archbee.com/api/optimize/3CesIL2dYMCHPZvRjp8S0/g-oVV3-BSidADWD98j72h_smileguard-splint-yellowing.png" size="70" width="2200" height="2063" position="flex-start" alt="Yellowing of splints" showCaption="false"}
# Questions and Support
**For questions about resin properties, printing, washing or curing your denture teeth, please contact Desktop Health Support:**
[https://health.desktopmetal.com/support/](https://health.desktopmetal.com/support/)
For questions about your **Carbon printer** or **Carbon software settings** used for this resin, please [contact Carbon](https://learn.carbon3d.com/carbon-support):
- Email: [support@carbon3d.com](mailto\:support@carbon3d.com)
- Phone:
- **U.S. and Canada** 1-650-285-6307 option 2
- **Germany** +49 6102 5790849
- **UK **+44 (0) 2082 647484
- Printer UI: On the dashboard, select the **Prints** tab. **Select one of the printed projects.** Click **Request Help** in the lower right corner.
::Image[]{src="https://api.archbee.com/api/optimize/3CesIL2dYMCHPZvRjp8S0/YY6yCChSIB8SevmBwY76W_request-help-01.png" size="70" width="6541" height="3371" position="flex-start" alt="Location of button in the printer software" showCaption="false"}