---
title: Desktop Health Flexcera Smile and Flexcera Smile Ultra+
slug: materials/desktop-health-flexcera-smile
description: Unlock the full potential of 3D printing with our comprehensive guide on Flexcera™ Smile and Flexcera™ Smile Ultra+ materials for Carbon M-Series printers. Discover essential tips on model support, orientation techniques, and resin preparation.
docTags:
createdAt: 2024-07-15T10:33:19.699Z
---
# Overview
::::VerticalSplit{layout="middle"}
:::VerticalSplitItem
**Flexcera™ Smile **and **Flexcera™ Smile Ultra+ **are now available for Carbon M- Series printers to produce artificial teeth for dental prostheses, which are one of the main components in the fabrication of removable permanent full dentures.
This guide will cover the orientation and supporting of the digital models for the applications listed above
:::
:::VerticalSplitItem

:::
::::
:::hint{type="info"}
This resin is not currently compatible with the [AO Polishing Cassette](docId\:iFFh3q8-WLk-LIqr87bd5).
:::
## Resource Links
### Flexcera Smile
::::LinkArray
:::LinkArrayItem{headerType="IMAGE" headerImage="https://api.archbee.com/api/optimize/uXbZOKjJTGpPhjapQ8fvM-IOQIJkNnkbUAw9Q-ap1FV-20241115-235121.jpg"}
[About the Material](https://www.carbon3d.com/materials/flexcera-smile)
:::
:::LinkArrayItem{headerType="IMAGE" headerImage="https://api.archbee.com/api/optimize/3CesIL2dYMCHPZvRjp8S0/cJAKqDDnRUAeJAXNRThMm-20251016-221334.png"}
[Instru ctions for Use - Smile](https://knowledge.desktophealth.com/Materials-DH/Instructions-for-Use/Flexcera-Smile/Flexcera-Smile-Instructions-for-Use.htm)
:::
:::LinkArrayItem{headerType="IMAGE" headerImage="https://api.archbee.com/api/optimize/3CesIL2dYMCHPZvRjp8S0/1r3fpdvMUMFVZGfey2Tjn-20251016-221405.jpg"}
[Safety Data Sheet](https://knowledge.desktophealth.com/Materials-DH/Safety-Data-Sheets/Flexcera-Smile/Flexcera-Smile-Safety-Data-Sheets.htm?tocpath=Desktop%20Health%7CMaterials%7CSafety%20Data%20Sheets%7C_____3)
:::
::::
### Flexcera Smile Ultra+
::::LinkArray
:::LinkArrayItem{headerType="IMAGE" headerImage="https://api.archbee.com/api/optimize/uXbZOKjJTGpPhjapQ8fvM-IOQIJkNnkbUAw9Q-ap1FV-20241115-235121.jpg"}
[About the Material](https://www.carbon3d.com/materials/flexcera-smile-ultra)
:::
:::LinkArrayItem{headerType="IMAGE" headerImage="https://api.archbee.com/api/optimize/3CesIL2dYMCHPZvRjp8S0/cJAKqDDnRUAeJAXNRThMm-20251016-221334.png"}
[Instructions for Use - Smile Ultra+](https://knowledge.desktophealth.com/Materials-DH/Instructions-for-Use/Flexcera-Smile-Ultra-Plus/Flexcera-Smile-Ultra-Plus-Instructions-for-Use.htm)
:::
:::LinkArrayItem{headerType="IMAGE" headerImage="https://api.archbee.com/api/optimize/3CesIL2dYMCHPZvRjp8S0/1r3fpdvMUMFVZGfey2Tjn-20251016-221405.jpg"}
[Safety Data Sheet](https://knowledge.desktophealth.com/Materials-DH/Safety-Data-Sheets/Flexcera-Smile-Ultra-Plus/Flexcera-Smile-Ultra-Plus-Safety-Data-Sheets.htm?tocpath=Desktop%20Health%7CMaterials%7CSafety%20Data%20Sheets%7C_____4)
:::
::::
## Protocol
This downloadable handout provides important usage information, including instructions about storage and post-processing. Print it out and bring it into the lab!
:::hint{type="info"}
**This protocol sheet applies to both Flexcera Smile and Flexcera Smile Ultra+.**
:::
::File{src="https://api.archbee.com/api/presign/IUjOpuVPV7qLYmC62cjKs-8jzhfiCB8CfYuOjvOa0gX-20240920-190015.pdf" label="Flexcera Smile Ultra+ Protocol v02.00.pdf"}
## Dental Post-Processing Grids
::::VerticalSplit{layout="right"}
:::VerticalSplitItem
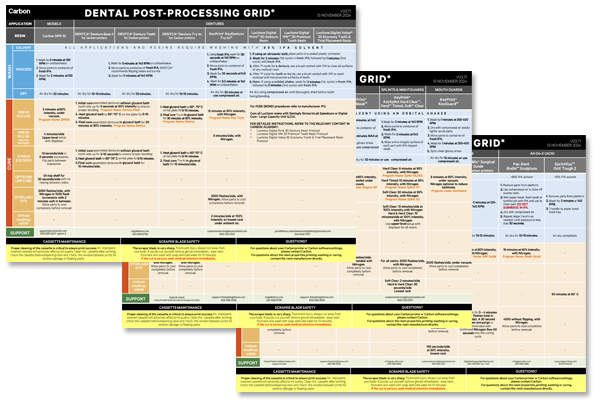
One of our most popular downloads! This table provides washing and curing instructions for all supported dental resins.
Print it and use it in the lab as a quick reference.
:::
:::VerticalSplitItem
:::
::::
::::VerticalSplit{layout="left"}
:::VerticalSplitItem
**English**
:::
:::VerticalSplitItem
::File{src="https://api.archbee.com/api/presign/3CesIL2dYMCHPZvRjp8S0/vQ2WsRger2d-CoLrn-m5f_dental-post-processing-grids-v0501.pdf" label="Dental-Post-Processing-Grids_v0501.pdf"}
:::
::::
::::VerticalSplit{layout="left"}
:::VerticalSplitItem
**German/Deutsch**
:::
:::VerticalSplitItem
::File{src="https://api.archbee.com/api/presign/uXbZOKjJTGpPhjapQ8fvM-seBSLAiWUzNDRI1GCLlop-20241125-214312.pdf" label="ZAHNÄRZTLICHES NACHBEARBEITUNGSGITTER v03.71 DE Deutsch.pdf"}
:::
::::
::::VerticalSplit{layout="left"}
:::VerticalSplitItem
**Spanish/Español**
:::
:::VerticalSplitItem
::File{src="https://api.archbee.com/api/presign/uXbZOKjJTGpPhjapQ8fvM-2i0UhzOfuA4aYJFusL1v2-20241203-180542.pdf" label="Rejilla de Posprocesamiento Dental v03.71 ES Espanol Spanish.pdf"}
:::
::::
## Flexcera Smile Application
**Flexcera™ Smile may only be used for the production of artificial teeth for dental protheses, **which are one of the main components in the fabrication of removable permanent full dentures. Any deviation from the Instructions for Use can negatively affect the chemical and physical properties of the finished product. Consequently, the biocompatibility of the full denture cannot be guaranteed.
Flexcera™ Smile may not be used for the production of e.g. crowns, bridges, veneers, cover dentures, implant retained full or partial dentures or any other application which deviates from the indication.
:::hint{type="info"}
**For design recommendations, see manufacturer instructions for use **[here](https://knowledge.desktophealth.com/hc/en-us/sections/4416666572695-Instructions-for-Use)**.**
:::
## Resin Shades Available
Carbon has validated four shades of Flexcera Smile/Flexcera Smile Ultra+ resins: Bleach, A1, A2 and B1. There are two options in the printer UI resin menu:
- **Flexcera Smile/Flexcera Smile Ultra+ Bleach** for use with the Bleach shade.
- **Flexcera Smile/Flexcera Smile Ultra+ A1, A2, B1** for use with A1, A2 or B1 shades.
| **Resin Shade** | **Resin menu option** |
| --------------- | -------------------------------- |
| Bleach | Flexcera Smile/Ultra+ Bleach |
| A1, A2, or B1 | Flexcera Smile/Ultra+ A1, A2, B1 |
# Preparation Tips
::::VerticalSplit{layout="middle"}
:::VerticalSplitItem
## Resin menu options
Carbon offers two resin options in the printer UI for use with Flexcera Smile and Flexcera Smile Ultra+.
- **Flexcera Smile/Ultra+ Bleach** for use with Bleach shade.
- **Flexcera Smile/Ultra+ A1, A2, B1** for use with A1, A2 or B1 shades.
:::
:::VerticalSplitItem

:::
::::
## Prepare Resin Before Printing
Before using the material for the first time or after prolonged storage, shake the material bottle vigorously for approximately** 5 minutes.**
Vigorous shaking may cause air bubbles to form. Allow the material to rest in the bottle for an **additional 5 minutes** to allow any air bubbles to rise and dissipate before use.
# General Orientation & Support Information
## Hide the Platform
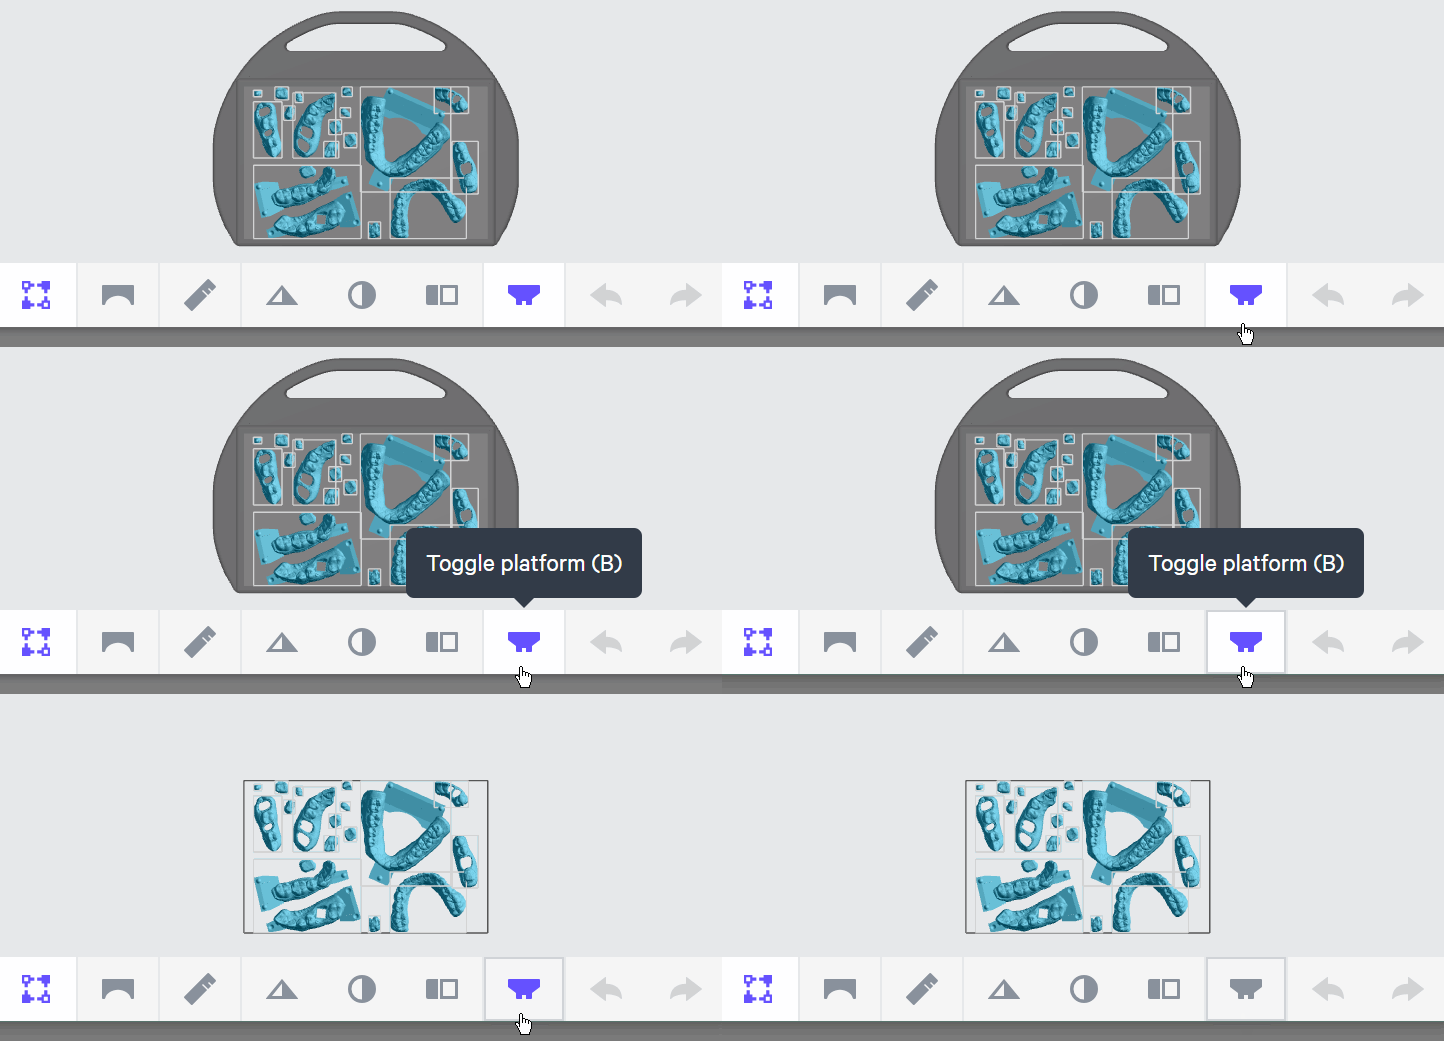
Use **Toggle platform** (or press **B**) to hide the platform before orienting parts. This will make it easier to see overhangs and place supports.
::::VerticalSplit{layout="middle"}
:::VerticalSplitItem
### Patch tool
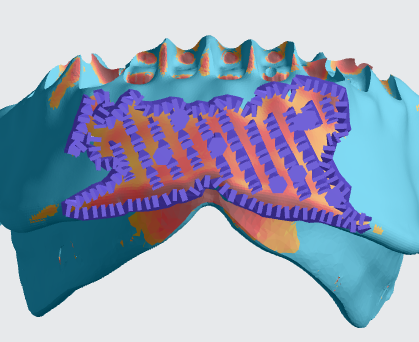
- The [Patch tool](docId\:VUbpoAitbLM11aM9-qJ1p) speeds up support creation by automatically supporting an area with just a few clicks. It is useful for supporting **larger areas** of overhang that would take longer to support manually.
- It is often useful to support your parts with this tool **before **manually adding supports.
::Image[]{src="https://res.cloudinary.com/carbon3d/image/upload/v1741914725/Education/Materials/dental/__General_Use/standard-support-menu-patch.png" size="50" width="208" height="73" position="flex-start" showCaption="false"}
:::
:::VerticalSplitItem
:::
::::
### Patch Workflow
::::VerticalSplit{layout="middle"}
:::VerticalSplitItem
1. Select the part to be supported.
2. Orient the camera so that the overhangs are clearly visible.
3. Check that **Patch **is selected.
4. Click on each large overhang to select it. A green patch will appear over each overhang. Repeat until all the large overhangs are selected.
5. Under **Support Attributes → Primary Support Type,** select **Fence.**
6. The other Support Attributes should remain their default values.
7. Click **Generate All** to create the support fences.
:::
:::VerticalSplitItem

:::
::::
::::VerticalSplit{layout="middle"}
:::VerticalSplitItem
### Fence tool
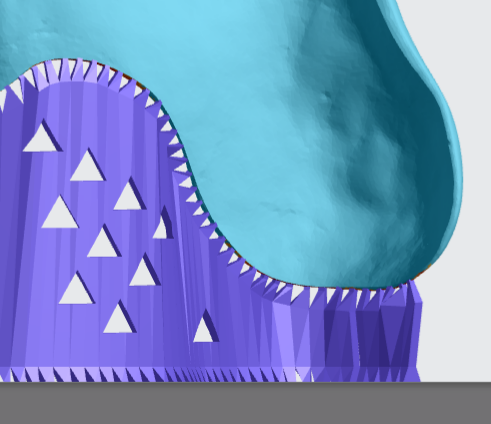
- [Fence supports](docId\:VUbpoAitbLM11aM9-qJ1p) are manually placed by the user and are best suited on **linear overhangs **or smaller areas.
- Fences provide stability while leaving smaller nubs than the default Bars option.
::Image[]{src="https://res.cloudinary.com/carbon3d/image/upload/v1741914724/Education/Materials/dental/__General_Use/standard-support-menu-fence.png" size="50" width="214" height="77" position="flex-start" showCaption="false"}
:::
:::VerticalSplitItem
:::
::::
:::hint{type="info"}
**Continued from Patch workflow above. So be sure the part is selected and overhangs are clearly visible.**
:::
### Fence Workflow
::::VerticalSplit{layout="middle"}
:::VerticalSplitItem
1. Select **Fence **tool.
2. Click a **series of points **in an area of overhang to define the fence.
1. Target long, narrow overhangs and small overhangs.
3. Click **ESC key **to finish adding points to a polyline.
1. Hold down **E key **to reposition points.
2. Click off of the part and drag a box to select points. Press **Backspace **to delete.
3. Click a polyline to select for editing.
4. Support Attributes should remain their default values.
5. Click **Generate All** to create the support fences.
6. Repeat steps 1 - 5 as needed.
1. Alternately, you can add multiple polylines as needed and then click **Generate All** to create multiple fences at once.
:::
:::VerticalSplitItem

:::
::::
:::hint{type="info"}
Review [Supports](docId\:VUbpoAitbLM11aM9-qJ1p) in [Printer UI](docId\:oId4ZNZtZYeltTPVJ984a) course for more information.
:::
## Occlusal surfaces towards platform
::::VerticalSplit{layout="middle"}
:::VerticalSplitItem
- Digital models should be oriented with the **occlusal surfaces facing the platform. **
- **Does not apply to try-ins or full-arch denture teeth.**
- Necessary to maintain accuracy.
- Ensures supports are on the occlusal surfaces enabling greater accuracy for mating surfac
:::
:::VerticalSplitItem

:::
::::
## No overhangs on interface
::::VerticalSplit{layout="middle"}
:::VerticalSplitItem
Orient parts so that **interfaces and margins are free from overhangs** so that no supports are required there. Supports leave nubs which require more finishing and can affect fit with mating parts or teeth.
:::
:::VerticalSplitItem

:::
::::
:::::ExpandableHeading
# Crowns, Bridges and Veneers
## Introduction
Crowns, veneers and bridges have similar requirements.
- No overhangs on margins.
- No overhangs on interface surfaces.
- Minimum overhangs on buccal/lingual surfaces.

## Orientation
::::VerticalSplit{layout="middle"}
:::VerticalSplitItem
1\. Click on **Orient** or **Shift + O** in the top bar in the printer interface.
2\. In the lower right corner of the bottom bar, turn on **Overhang Detection** or **V key** and set to **40 degrees. **Areas that need support will appear **red****.**
:::
:::VerticalSplitItem

:::
::::
::::VerticalSplit{layout="middle"}
:::VerticalSplitItem
3\. Orient each part so that the margin and interface are **free of overhangs**.
4\. Refine orientation to **minimize overhangs** on other surfaces.
The margin and interface of each part should now be free of overhangs. The remaining surfaces should have a minimal amount of overhangs.
:::
:::VerticalSplitItem

:::
::::
:::hint{type="info"}
**Margins and interfaces that have overhangs will require supports.**These supports affect fit and will require finishing to ensure proper seating.
:::
## Supporting
Follow the application specific recommendations below.
### Incisors and canines
In addition to supporting overhangs, these teeth require additional supports to maximize accuracy and print success:
- **Secondary fence supports** offset to the **lingual side** of the incisal edge/cusp tip
- **Two rows of fences** on the **labial surface** located at approximately **1/4 and 3/4** **of the tooth height.**
The example below shows the additional supports needed on a veneer for an incisor.
**Secondary fence on lingual side**
::::VerticalSplit{layout="middle"}
:::VerticalSplitItem
1\. Support overhang at incisal edge with a single fence.

3\. Generated supports.

:::
:::VerticalSplitItem
2\. Add secondary fence approximately 1 mm to the lingual side.

4\. Side view of generated supports.

:::
::::
**Two fences on the labial surface**
::::VerticalSplit{layout="middle"}
:::VerticalSplitItem
1\. Labial surface of veneer for incisor.

3\. Generated supports.

:::
:::VerticalSplitItem
2\. Add fences approximately 1/4 and 3/4 of the tooth height.

4\. Side view of generated supports.

:::
::::
### Examples of well-supported parts
::::VerticalSplit{layout="middle"}
:::VerticalSplitItem
Crown

:::
:::VerticalSplitItem
Veneer

:::
::::

:::::
:::::ExpandableHeading
# Denture Try-Ins
:::hint{type="info"}
**The following information applies to upper and lower denture try-ins.**
:::
**Introduction**
Denture try-ins the following general requirements:
- Orient try-ins with anterior facing platform.
- Minimize overhangs on intaglio surfaces.
- No overhangs on occlusal tooth surfaces
### Orientation
::::VerticalSplit{layout="middle"}
:::VerticalSplitItem
1\. Click on **Orient** or **Shift + O** in the top bar in the printer interface.
2\. In the lower right corner of the bottom bar, turn on **Overhang Detection** or **V key** and set to **40 degrees. **Areas that need support will appear **red****.**
:::
:::VerticalSplitItem

:::
::::
::::VerticalSplit{layout="middle"}
:::VerticalSplitItem
3\. Orient the occlusal surfaces roughly parallel to the platform.
4\. Rotate model so the occlusal surfaces are **90 degrees to occlusal side.**
Note: There will be overhangs on molars and labial surfaces.
:::
:::VerticalSplitItem
::Image[]{src="https://api.archbee.com/api/optimize/IUjOpuVPV7qLYmC62cjKs-R7VANjtkplSTMpA8QO1u_-20240920-190402.gif" size="70" width="862" height="442" position="center" alt="Orientation of try-in" showCaption="false"}
:::
::::
:::hint{type="info"}
**Surfaces that have overhangs will require supports.**
These supports affect fit and will require finishing to ensure proper seating.
:::
### Supporting
Follow the application specific recommendations below.
- Support all overhangs as needed using the Patch or Fence tools.
- In most cases, Patch is the only tool that will be required.
- When using Patch tool, set **Fence spacing to 2 mm.**
- If redundant bar supports are added, they may be manually deleted.
- Don't forget to support T-bars and the inner edge.
**Anterior labial surfaces**
::embed[]{url="https://player.vimeo.com/video/892008338?dnt=1"}
###
**T-bars**
T-bars also require supports.
- **Use fence supports** to quickly support T-bars.
- Press **ESC **key to end a fence.
::embed[]{url="https://player.vimeo.com/video/842806000?dnt=1"}
###
**Inner lingual edge of lower try-in**
Typically, only a single fence is needed to support the lingual edge.

**Example of well-supported try-ins**
::::VerticalSplit{layout="middle"}
:::VerticalSplitItem

:::
:::VerticalSplitItem
:::
::::
:::::
:::::ExpandableHeading
# Denture Teeth - Full Arches
:::hint{type="info"}
**The following information applies to full arches only.**
:::
**Introduction**
- Unlike other applications, denture teeth require placement of supports on basal surfaces.
- No overhangs on occlusal tooth surfaces.
### Orientation
::::VerticalSplit{layout="middle"}
:::VerticalSplitItem
1\. Click on **Orient** or **Shift + O** in the top bar in the printer interface.
2\. In the lower right corner of the bottom bar, turn on **Overhang Detection** or **V key** and set to **50 degrees. **Areas that need support will appear **red****.**
:::
:::VerticalSplitItem

:::
::::
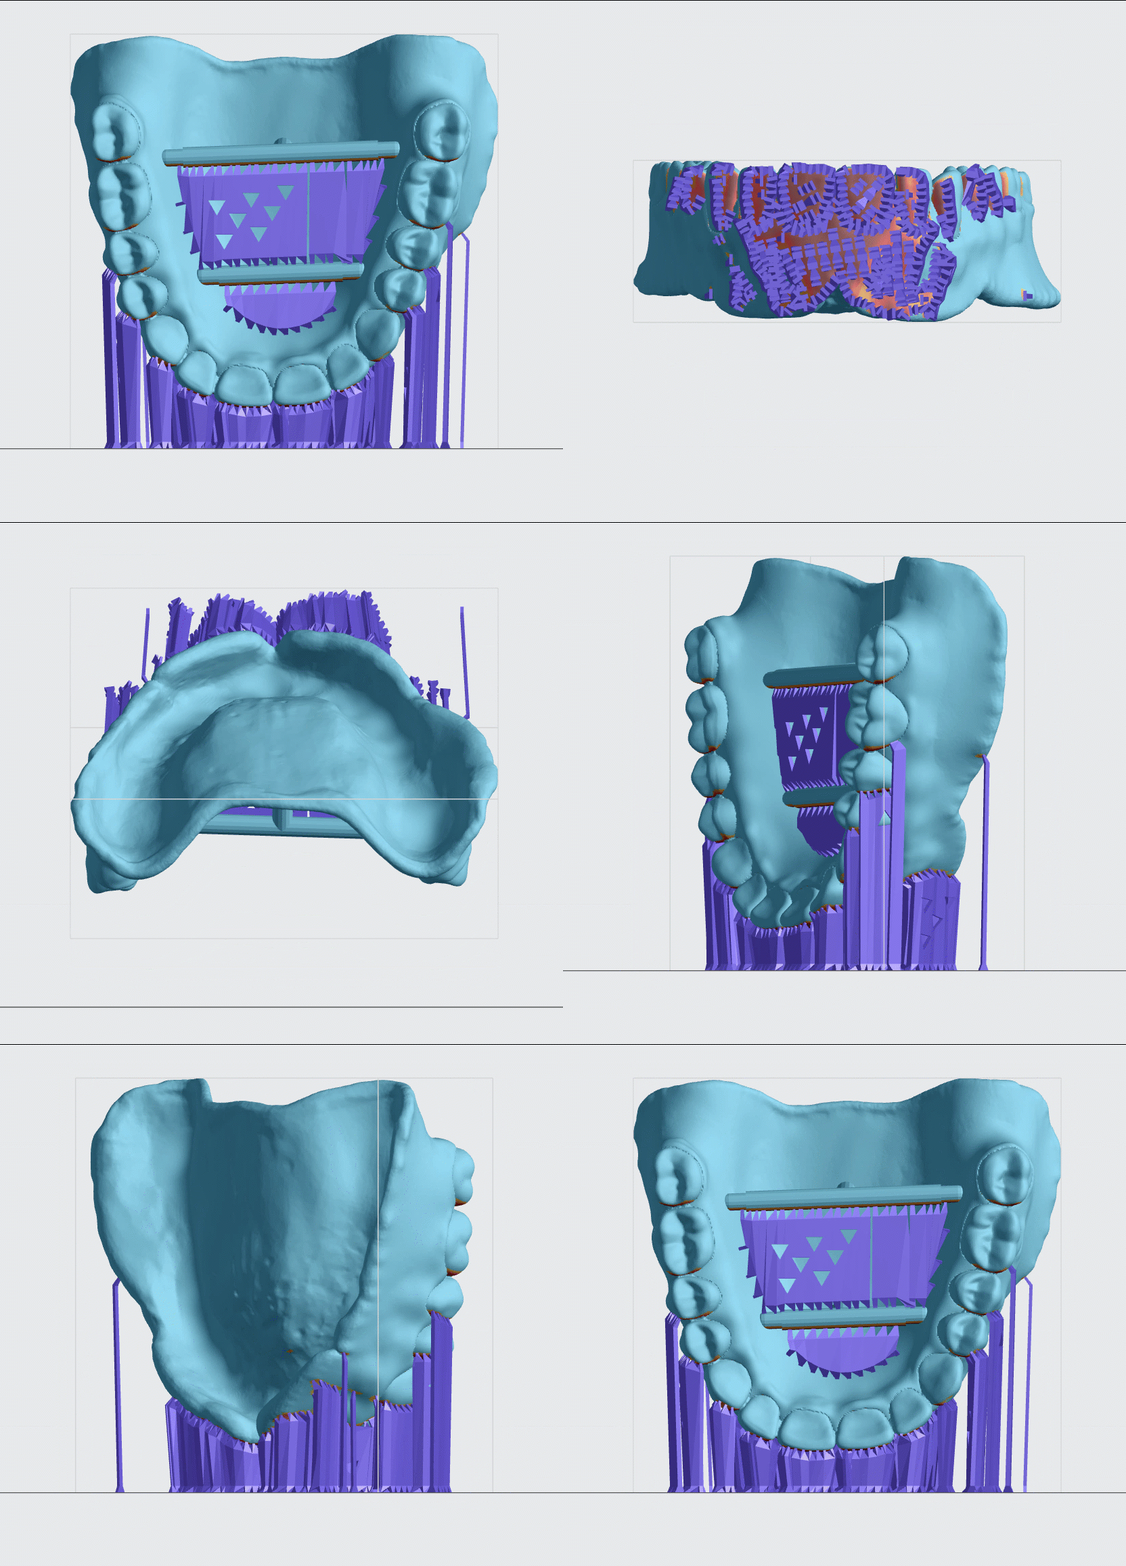
::::VerticalSplit{layout="middle"}
:::VerticalSplitItem
3\. Orient the occlusal surfaces **facing up**, **parallel **to the platform.
4\. Rotate **30 degrees** up to lingual side.
:::
:::VerticalSplitItem
::Image[]{src="https://api.archbee.com/api/optimize/IUjOpuVPV7qLYmC62cjKs-Q9fgKkiLiZcDLjwf4sJd0-20240920-192856.gif" size="70" width="1100" height="462" position="center" alt="Orient teeth" showCaption="false"}
:::
::::
:::hint{type="info"}
**Surfaces that have overhangs will require supports. **These supports affect fit and will require finishing to ensure proper seating.
:::
##
### Supporting
Follow the application specific recommendations below.
- Support all overhangs as needed using the Patch or Fence tools.
- In most cases, Patch is the only tool that will be required.
- Limit supports to basal surfaces.
::embed[]{url="https://player.vimeo.com/video/841963636?dnt=1"}
:::::
# Nesting

::::VerticalSplit{layout="right"}
:::VerticalSplitItem
1. Select the **Layout tab**** (Shift + L)** in the top menu bar.
2. Under **Auto Layout,** select **Gen2.**
- Gen2 usually gives the most effecient packing for dental devices.
3. Enter at least **1 mm** in **Padding.**
- Models require a minimum of 1 mm of space between them.
4. Leave **Optimize starting rotation** unchecked.
- This leaves your parts in their previous orientations.
5. Leave **Allowed rotations** at the default setting.
- This gives the software maximum flexibility to fit the most possible parts on the build platform.
6. Press the **Auto Layout** button to arrange your parts.
:::
:::VerticalSplitItem

:::
::::
If necessary, nesting can be changed manually:
- Click and drag parts to adjust their position.
- Modify Z rotation by using the **Spin **tool or manual rotations under the **Orient tab** **(Shift + O).**
- Use the **Part List tab **as needed to more easily select models and focus on them.
# Print Preparation
## Print Controls
Click **Print Controls** or **Shift + P** in the top menu bar.

## Choose the correct print profile
When printing **crown and bridge geometries** in Flexcera Smile/Flexcera Smile Ultra+, use the print profile **Flexcera Smile Ultra+ C\&B.**
- The use of this print profile will improve the accuracy of the intaglio surfaces of these types of geometries, but will also increase the print time.
- Do not use this print profile when printing denture teeth or monolithic dentures in Flexcera Smile/Flexcera Smile Ultra+.
- If you do not see the Flexcera Smile Ultra+ C\&B print profile in your print controls, please contact Carbon Support.
### Slicing
::::VerticalSplit{layout="middle"}
:::VerticalSplitItem
1. There are two options for **Print Profile****:**
- When printing **crown and bridge geometries select** **Flexcera Smile Ultra+ C\&B.**
- For denture teeth, monolithic dentures and veneers, use the **Default **profile.
2. Under **Slicing,** select either **Standard (100 µm)**** or ****Fine (50 µm)****, **depending on your preference.
3. **Leave all other values at their default values.**
:::
:::VerticalSplitItem

:::
::::
:::hint{type="warning"}
**NOTE: Fine (50 µm) slice thickness will result in increased print times compared to Standard (100 µm).**
:::
| **Application** | **Print Profile** | **Slicing** |
| ----------------------------------- | -------------------------- | ------------------------------------------------- |
| Denture Teeth or Monolithic Denture | Default | Standard (100 µm)
or
Fine (50 µm)
|
| Crown or Bridge | Flexcera Smile Ultra+ C\&B | |
| Veneer | Default | |
## Project Analysis
1. Select the **Project Analysis** tab.
2. Click **Start Analysis** and wait for the processing to complete.
1. Note the required resin volume and print time.
3. Click **Add to Queue.**

# Manufacturer Instructions for Use
### Flexcera Smile
::::LinkArray
:::LinkArrayItem{headerType="IMAGE" headerImage="https://api.archbee.com/api/optimize/3CesIL2dYMCHPZvRjp8S0/cJAKqDDnRUAeJAXNRThMm-20251016-221334.png"}
[Instructions for Use - Smile](https://knowledge.desktophealth.com/Materials-DH/Instructions-for-Use/Flexcera-Smile/Flexcera-Smile-Instructions-for-Use.htm)
:::
::::
### Flexcera Smile Ultra+
::::LinkArray
:::LinkArrayItem{headerType="IMAGE" headerImage="https://api.archbee.com/api/optimize/3CesIL2dYMCHPZvRjp8S0/cJAKqDDnRUAeJAXNRThMm-20251016-221334.png"}
[Instructions for Use - Smile Ultra+](https://knowledge.desktophealth.com/Materials-DH/Instructions-for-Use/Flexcera-Smile-Ultra-Plus/Flexcera-Smile-Ultra-Plus-Instructions-for-Use.htm)
:::
::::
# Questions & Support
**For questions about the resin properties, printing, washing or curing your parts, please contact the support team:**
- Submit support ticket: [https://health.desktopmetal.com/support/ticket/](https://health.desktopmetal.com/support/ticket/)
For questions about your **Carbon printer** or **Carbon software settings** used for this resin, please [contact Carbon](https://learn.carbon3d.com/carbon-support):
- Email: [support@carbon3d.com](mailto\:support@carbon3d.com)
- Phone:
- **U.S. and Canada** 1-650-285-6307 option 2
- **Germany** +49 6102 5790849
- **UK **+44 (0) 2082 647484
- Printer UI: On the dashboard, select the **Prints** tab. **Select one of the printed projects.** Click **Request Help** in the lower right corner.
::Image[]{src="https://api.archbee.com/api/optimize/3CesIL2dYMCHPZvRjp8S0/YY6yCChSIB8SevmBwY76W_request-help-01.png" size="70" width="6541" height="3371" position="flex-start" alt="Location of button in the printer software" showCaption="false"}