---
title: DENTCA Denture Teeth
slug: materials/dentca-denture-teeth
description: Unlock the potential of 3D printing with DENTCA Denture Base II, optimized for Carbon M Series printers. Our comprehensive guide details essential preparation and post-processing protocols.
docTags:
createdAt: 2024-07-09T15:11:53.206Z
---
# Overview
::::VerticalSplit{layout="middle"}
:::VerticalSplitItem
**DENTCA® Denture Teeth for Carbon printers** is now available for Carbon M Series printers to produce teeth for dentures. When paired with DENTCA Denture Base II, you can create complete denture appliances with DLS.
DENTCA® Denture Teeth for Carbon printers currently comes in 6 shades:
- A1
- A2
- A3
- A3.5
- B1
- B2
:::
:::VerticalSplitItem

:::
::::
This guide will cover preparation of your digital denture teeth models to properly prepare them for printing with DENTCA® Denture Teeth for Carbon printers resin.
:::hint{type="info"}
This resin is not currently compatible with the [AO Polishing Cassette](docId\:iFFh3q8-WLk-LIqr87bd5).
:::
## Resource Links
::::LinkArray
:::LinkArrayItem{headerType="IMAGE" headerImage="https://api.archbee.com/api/optimize/uXbZOKjJTGpPhjapQ8fvM-IOQIJkNnkbUAw9Q-ap1FV-20241115-235121.jpg"}
[About the Material](https://www.carbon3d.com/materials/3d-printed-denture)
:::
:::LinkArrayItem{headerType="IMAGE" headerImage="https://api.archbee.com/api/optimize/3CesIL2dYMCHPZvRjp8S0/cJAKqDDnRUAeJAXNRThMm-20251016-221334.png"}
[Instructions for Use](https://s3-us-west-1.amazonaws.com/dentca.b-dentca-w-ss-paperclip/production/public/ckeditor_assets/attachments/613/01-09-105-020_directions_for_use_-dentca_denture_teeth.pdf)
:::
:::LinkArrayItem{headerType="IMAGE" headerImage="https://api.archbee.com/api/optimize/3CesIL2dYMCHPZvRjp8S0/1r3fpdvMUMFVZGfey2Tjn-20251016-221405.jpg"}
[Safety Data Sheets](https://dentca.com/product/dentca-denture-teeth)
*Scroll down to Download the Safety Data Sheet*
:::
::::
## Protocol
This downloadable handout provides important usage information, including instructions about storage and post-processing. Print it out and bring it into the lab!
::File{src="https://api.archbee.com/api/presign/l3qPiIkNKH_ws5f331N8f-V9Uji-WiE3L8vazGOsnz1-20240911-163052.pdf" label="DENTCA Denture Teeth Protocol v01.04.pdf"}
## Dental Post-Processing Grids
::::VerticalSplit{layout="right"}
:::VerticalSplitItem
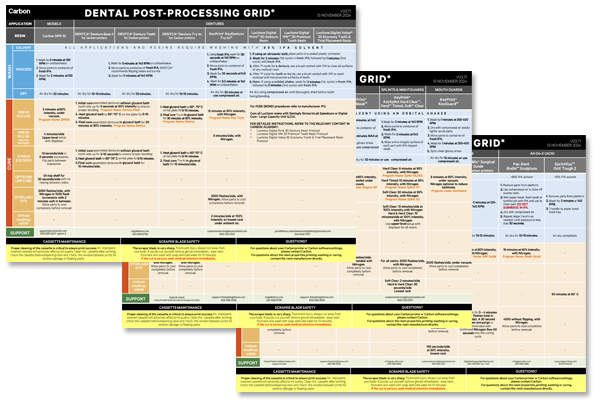
One of our most popular downloads! This table provides washing and curing instructions for all supported dental resins.
Print it and use it in the lab as a quick reference.
:::
:::VerticalSplitItem
:::
::::
::::VerticalSplit{layout="left"}
:::VerticalSplitItem
**English**
:::
:::VerticalSplitItem
::File{src="https://api.archbee.com/api/presign/3CesIL2dYMCHPZvRjp8S0/vQ2WsRger2d-CoLrn-m5f_dental-post-processing-grids-v0501.pdf" label="Dental-Post-Processing-Grids_v0501.pdf"}
:::
::::
::::VerticalSplit{layout="left"}
:::VerticalSplitItem
**German/Deutsch**
:::
:::VerticalSplitItem
::File{src="https://api.archbee.com/api/presign/uXbZOKjJTGpPhjapQ8fvM-seBSLAiWUzNDRI1GCLlop-20241125-214312.pdf" label="ZAHNÄRZTLICHES NACHBEARBEITUNGSGITTER v03.71 DE Deutsch.pdf"}
:::
::::
::::VerticalSplit{layout="left"}
:::VerticalSplitItem
**Spanish/Español**
:::
:::VerticalSplitItem
::File{src="https://api.archbee.com/api/presign/uXbZOKjJTGpPhjapQ8fvM-2i0UhzOfuA4aYJFusL1v2-20241203-180542.pdf" label="Rejilla de Posprocesamiento Dental v03.71 ES Espanol Spanish.pdf"}
:::
::::
# General Orientation & Support Information
## Hide the Platform
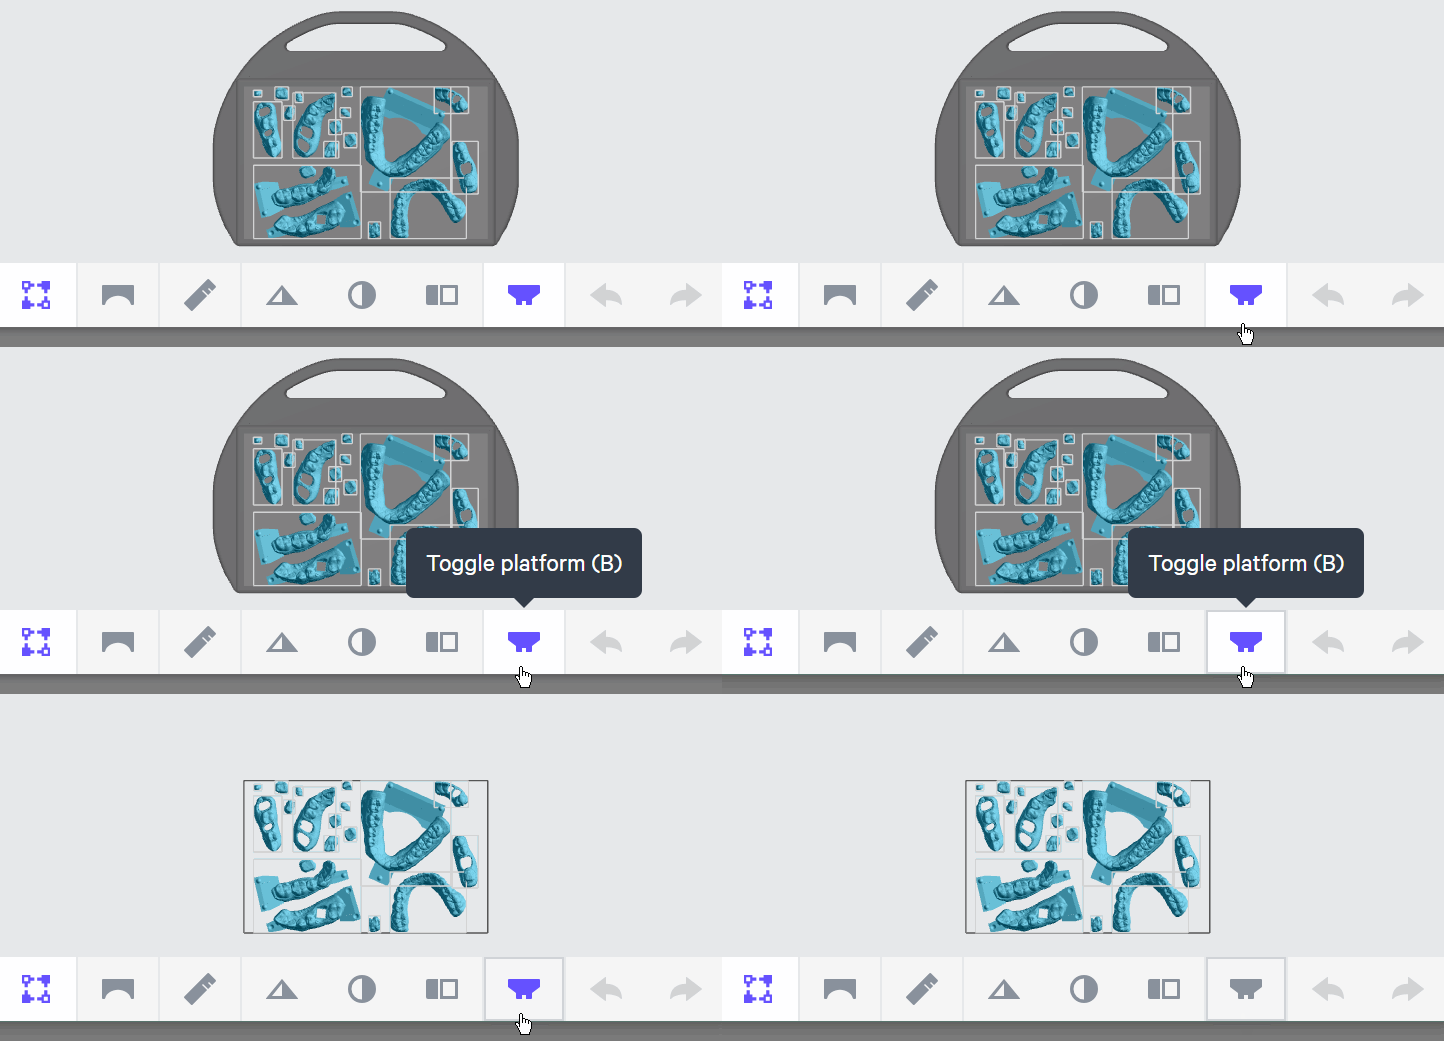
Use **Toggle platform** (or press **B**) to hide the platform before orienting parts. This will make it easier to see overhangs and place supports.
## Use Patch and Fence tools to create supports
::::VerticalSplit{layout="middle"}
:::VerticalSplitItem
### Patch tool
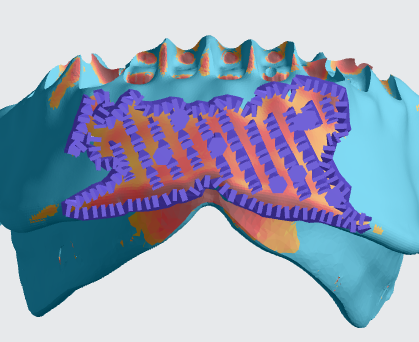
- The [Patch tool](docId\:VUbpoAitbLM11aM9-qJ1p) speeds up support creation by automatically supporting an area with just a few clicks. It is useful for supporting **larger areas** of overhang that would take longer to support manually.
- It is often useful to support your parts with this tool **before **manually adding supports.
::Image[]{src="https://res.cloudinary.com/carbon3d/image/upload/v1741914725/Education/Materials/dental/__General_Use/standard-support-menu-patch.png" size="50" width="208" height="73" position="flex-start" showCaption="false"}
:::
:::VerticalSplitItem
:::
::::
::::VerticalSplit{layout="middle"}
:::VerticalSplitItem
### Fence tool
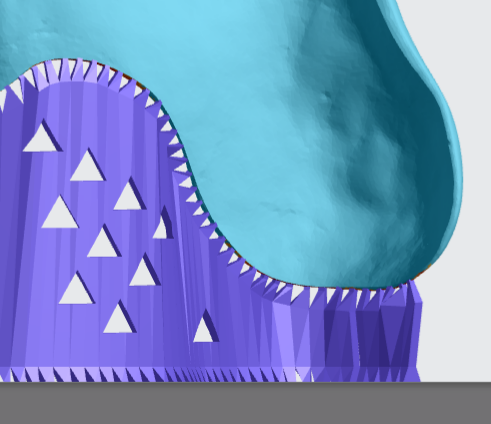
- [Fence supports](docId\:VUbpoAitbLM11aM9-qJ1p) are manually placed by the user and are best suited on **linear overhangs **or smaller areas.
- Fences provide stability while leaving smaller nubs than the default Bars option.
::Image[]{src="https://res.cloudinary.com/carbon3d/image/upload/v1741914724/Education/Materials/dental/__General_Use/standard-support-menu-fence.png" size="50" width="214" height="77" position="flex-start" showCaption="false"}
:::
:::VerticalSplitItem
:::
::::
:::hint{type="info"}
Review [Supports](docId\:VUbpoAitbLM11aM9-qJ1p) in [Printer UI](docId\:oId4ZNZtZYeltTPVJ984a) course for more information.
:::
# Denture Teeth
## Orientation
### Orientation Of Anterior Teeth
::::VerticalSplit{layout="middle"}
:::VerticalSplitItem
1. Orient the 2 anterior blocks so the **root side is facing the platform**.
2. Position the camera so you are looking straight down on the platform:
1. Push the **Reset camera icon** in the lower left corner of the screen to return to the default view.
2. Push **▲ to look straight down** at platform.
3. Adjust the blocks so they are **mostly parallel with the front edge of the platform** (X Axis).
1. We recommend typing values into the Z axis field. Changing orientation with the mouse or Snap to Platform function is more challenging.
4. Make sure that the **lingual region of each block is facing the lower portion of the screen**.
:::
:::VerticalSplitItem

:::
::::
### Final Orientation Of Anterior Teeth
1. Enter** 45 **into the X Axis field.
1. The lingual side of the teeth blocks will rotate 45 degrees toward the platform.
::Image[]{src="https://api.archbee.com/api/optimize/3CesIL2dYMCHPZvRjp8S0/4nAZutExrXCYnJVrFO_cg_image.png" size="70" width="1158" height="826" position="center" alt="Final orientation of anterior teeth" showCaption="false"}
### Orientation Of Posterior Teeth
::::VerticalSplit{layout="middle"}
:::VerticalSplitItem
1. Orient each posterior block so the **root side is facing the platform**.
2. Position the camera so you are looking straight down on the platform:
1. Push the **Reset camera icon** in the lower left corner of the screen to return to the default view.
2. Push **▲ to look straight down** at platform.
3. Adjust the blocks so they are **mostly parallel with the side edges of the platform** (Y Axis).
1. We recommend typing values into the Z axis field. Changing orientation with the mouse or Snap to Platform function is more challenging.
4. Orient the blocks so the **occlusal surfaces are roughly parallel with the platform**.
:::
:::VerticalSplitItem

:::
::::
### Proper Orientation Of Denture Teeth Blocks
::::VerticalSplit{layout="middle"}
:::VerticalSplitItem
**Anterior Teeth Blocks**
- Root side facing platform.
- Parallel with X axis / front edge of platform
- Rotated 45 degrees with lingual side tilted toward the platform.
:::
:::VerticalSplitItem

:::
::::
::::VerticalSplit{layout="middle"}
:::VerticalSplitItem
**Posterior Teeth Blocks**
- Root side facing platform.
- Parallel with Y axis / sides of platform.
- Occlusal surfaces parallel with platform.
:::
:::VerticalSplitItem

:::
::::
### Orientation Of Full Arches
1. Orient the 2 arches so the **root side is facing the platform**.
2. Arches should be **roughly parallel with the platform**.
3. Because full arches are organic surfaces with no well defined flat areas, we do not recommend using Snap to Platform.

## Supporting
### Adding Supports
Denture teeth require precise placement of supports. Because of this, we currently recommend manually adding supports to parts.
::::VerticalSplit{layout="middle"}
:::VerticalSplitItem
1. Click **Support** in the dark gray bar.
2. Under Position, select **Above Platform** to lift parts off the platform.
3. Skip **Auto Support Method** as this mode is not recommended.
4. Click **Manually Add** to go to the Support editing interface.
:::
:::VerticalSplitItem

:::
::::
::::VerticalSplit{layout="right"}
:::VerticalSplitItem
**Note**: Using either Auto Support method will create **bar supports** that leave large nubs on tooth surfaces and do not provide adequate accuracy.
:::
:::VerticalSplitItem

:::
::::
### Fence Supports
Fences are ideal for supporting the root side of teeth that face the platform.
- They are easy to remove.
- Contact points require less finishing.
::::VerticalSplit{layout="middle"}
:::VerticalSplitItem
1. Click on **Fences**.
2. Click a **series of points** on the perimeter of the teeth block to define the fence.
- Use **Overhang Detection** to find areas that need support.
- Fences are only required at the edges.
3. Click **ESC key** and then hold down **E key** to reposition points.
4. Click **Generate** to create the fence geometry.
5. Repeat as needed.
:::
:::VerticalSplitItem

:::
::::
### Supporting Anterior Teeth
Use fence supports to support the anterior teeth blocks.
::::VerticalSplit{layout="middle"}
:::VerticalSplitItem
1. **Support perimeter of teeth with fence supports**.
- Do not position points of polyline on lingual or buccal surfaces.
- We recommend using a single, long fence for easier removal.
- A sequence of 2 or more short fences is acceptable.
2. **Add fence to posterior surface of each canine**.
- Do not position points of polyline on lingual or buccal surfaces.
:::
:::VerticalSplitItem

:::
::::
### Supporting Posterior Teeth
Use fence supports to support the outer perimeter of the posterior teeth blocks.
::::VerticalSplit{layout="middle"}
:::VerticalSplitItem
1. **Support perimeter of teeth with fence supports**.
- Do not position points of polyline on lingual or buccal surfaces.
- We recommend using a single, long fence for easier removal.
- A sequence of 2 or more short fences is acceptable.
:::
:::VerticalSplitItem

:::
::::
### Supporting Full Arches
Use fence supports to support the outer perimeter of the arch.
::::VerticalSplit{layout="middle"}
:::VerticalSplitItem
1. Support **perimeter of teeth** with fence supports.
- Do not position points of polyline on lingual or buccal surfaces.
- We recommend using a single, long fence for easier removal.
- A sequence of 2 or more short fences is acceptable.
2. Depending on the geometry and application, an **additional row of bar supports** between the fences may be required.
- Do not add bar supports to mating features.
:::
:::VerticalSplitItem

:::
::::
### Properly Oriented And Supported Denture Teeth
- Root sides facing platform.
- Supported **Above Platform**.
- Fences around part boundary.
::::VerticalSplit{layout="middle"}
:::VerticalSplitItem

**Anterior Teeth Blocks**
- Rotated 45° with lingual side tilted towards platform.
- **Additional fences** on posterior side of canines.
:::
:::VerticalSplitItem
::Image[]{src="https://api.archbee.com/api/optimize/3CesIL2dYMCHPZvRjp8S0/yJqGQVHVh1rbTXmOY2PpR_image.png" size="98" width="894" height="894" position="center" alt="Properly supported posterior teeth block" showCaption="false"}
**Posterior Teeth Blocks**
- Occlusal surface of teeth **roughly parallel with platform**.
:::
::::
# Nesting

::::VerticalSplit{layout="right"}
:::VerticalSplitItem
1. Select the **Layout tab**** (Shift + L)** in the top menu bar.
2. Under **Auto Layout,** select **Gen2.**
- Gen2 usually gives the most effecient packing for dental devices.
3. Enter at least **1 mm** in **Padding.**
- Models require a minimum of 1 mm of space between them.
4. Leave **Optimize starting rotation** unchecked.
- This leaves your parts in their previous orientations.
5. Leave **Allowed rotations** at the default setting.
- This gives the software maximum flexibility to fit the most possible parts on the build platform.
6. Press the **Auto Layout** button to arrange your parts.
:::
:::VerticalSplitItem

:::
::::
If necessary, nesting can be changed manually:
- Click and drag parts to adjust their position.
- Modify Z rotation by using the **Spin **tool or manual rotations under the **Orient tab** **(Shift + O).**
- Use the **Part List tab **as needed to more easily select models and focus on them.
# Print Preparation
## Print Controls

- Click **Print Controls** or **Shift + P** in the top menu bar.
- Under **Print Profile** select **Default**.
- Printing with release film can make part removal easier once printing is complete. If using release film, select **Print with release film**.
### Slicing
- Under Slicing, select either **Standard (100 µ) or Fine (50 µ) setting**.
- Fine slicing results in finer features at the cost of a longer print time.
## Project Analysis
1. Select the **Project Analysis** tab.
2. Click **Start Analysis** and wait for the processing to complete.
1. Note the required resin volume and print time.
3. Click **Add to Queue.**

# Manufacturer Instructions for Use
::::LinkArray
:::LinkArrayItem{headerType="IMAGE" headerImage="https://api.archbee.com/api/optimize/3CesIL2dYMCHPZvRjp8S0/cJAKqDDnRUAeJAXNRThMm-20251016-221334.png"}
[Instructions for Use](https://s3-us-west-1.amazonaws.com/dentca.b-dentca-w-ss-paperclip/production/public/ckeditor_assets/attachments/613/01-09-105-020_directions_for_use_-dentca_denture_teeth.pdf)
:::
::::
# Questions & Support
**For questions about the resin properties, printing, washing or curing your parts, please contact the DENTCA support team:**
- Email: cs\@dentca.com
- Phone: 424-558-8726
For questions about your **Carbon printer** or **Carbon software settings** used for this resin, please [contact Carbon](https://learn.carbon3d.com/carbon-support):
- Email: [support@carbon3d.com](mailto\:support@carbon3d.com)
- Phone:
- **U.S. and Canada** 1-650-285-6307 option 2
- **Germany** +49 6102 5790849
- **UK **+44 (0) 2082 647484
- Printer UI: On the dashboard, select the **Prints** tab. **Select one of the printed projects.** Click **Request Help** in the lower right corner.
::Image[]{src="https://api.archbee.com/api/optimize/3CesIL2dYMCHPZvRjp8S0/YY6yCChSIB8SevmBwY76W_request-help-01.png" size="70" width="6541" height="3371" position="flex-start" alt="Location of button in the printer software" showCaption="false"}