---
title: Maintenance
slug: hardware/l1-maintenance
description: Optimize the performance of your Carbon L1 printer with our comprehensive maintenance guide. This document outlines essential weekly, monthly, quarterly, and annual tasks to ensure effective operation, including cleaning protocols and equipment checks.
docTags:
createdAt: 2024-07-03T23:23:54.043Z
---
Like all equipment, the L1 needs regular maintenance to remain in good working condition. Use the following recommendations to keep your printer running smoothly.
Information is organized by the frequency of the maintenance tasks.
- [Weekly](docId:98b0AYItf-NOlpodFyUKj)
- [Monthly](docId:98b0AYItf-NOlpodFyUKj)
- [Quarterly](docId:98b0AYItf-NOlpodFyUKj)
- [Annually](docId:98b0AYItf-NOlpodFyUKj)
- [As Needed](docId:98b0AYItf-NOlpodFyUKj)
:::hint{type="info"}
For maintenance of third party accessories (oxygen supply, chiller, etc.) consult the manufacturer [manuals](docId:2sKhKlz4PfBvk8EykK9Wl).
:::

:::::ExpandableHeading
# Weekly
## L1 Printer
### Clean Display
::::VerticalSplit{layout="middle"}
:::VerticalSplitItem
1. Remove the platform or make sure the print queue is empty to avoid starting a print accidentally during cleaning.
2. Gently clean the front display buttons with IPA and a shop towel to remove resin residue.
- Do not use IPA wipes, which have a high water content.
- Do not use acetone.
:::
:::VerticalSplitItem

:::
::::
### Inspect Spill Window
The light engine projects light through the spill window onto the cassette window to cure resin. If the spill window is not clean, it may affect part quality.
::::VerticalSplit{layout="middle"}
:::VerticalSplitItem
1. Remove the platform.
2. Remove the cassette.
3. Inspect the **light engine spill window** inside the projection volume for any smudges, resin, dust or debris that will affect print performance.
:::
:::VerticalSplitItem

:::
::::
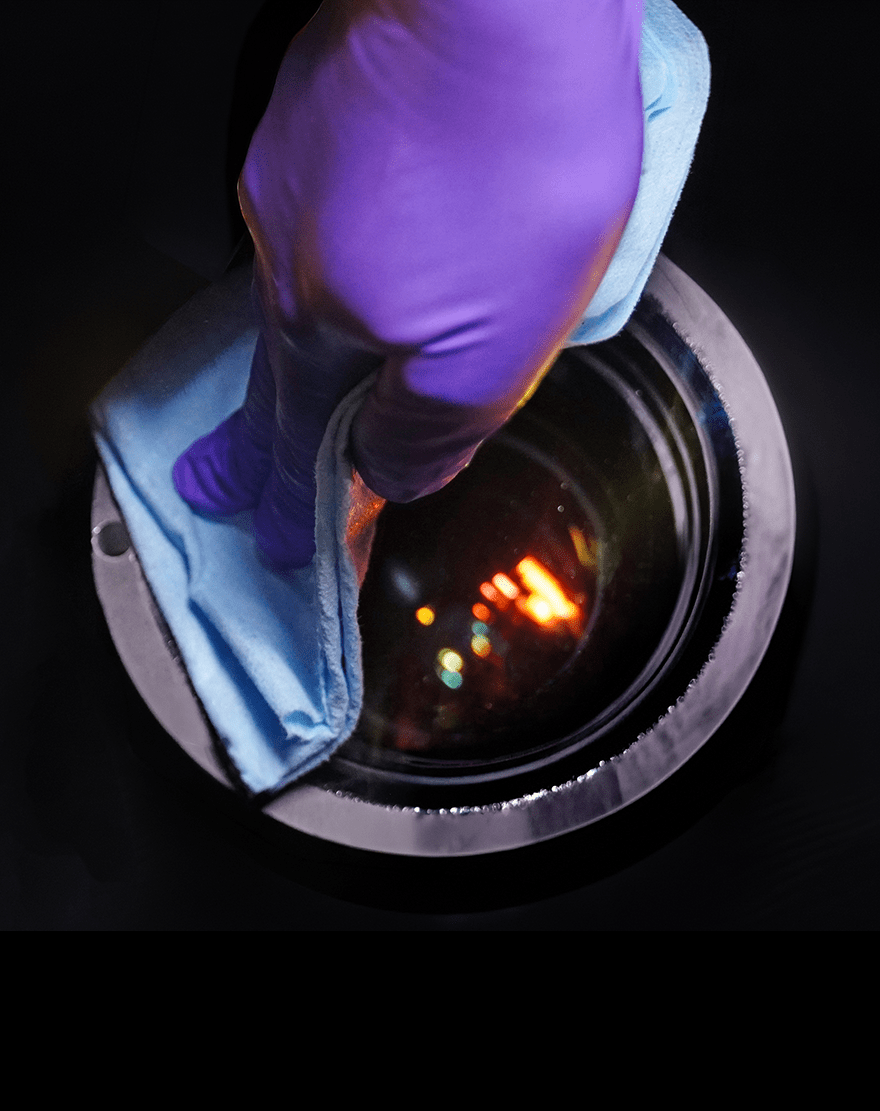
**Clean Spill Window Glass if Dirty**
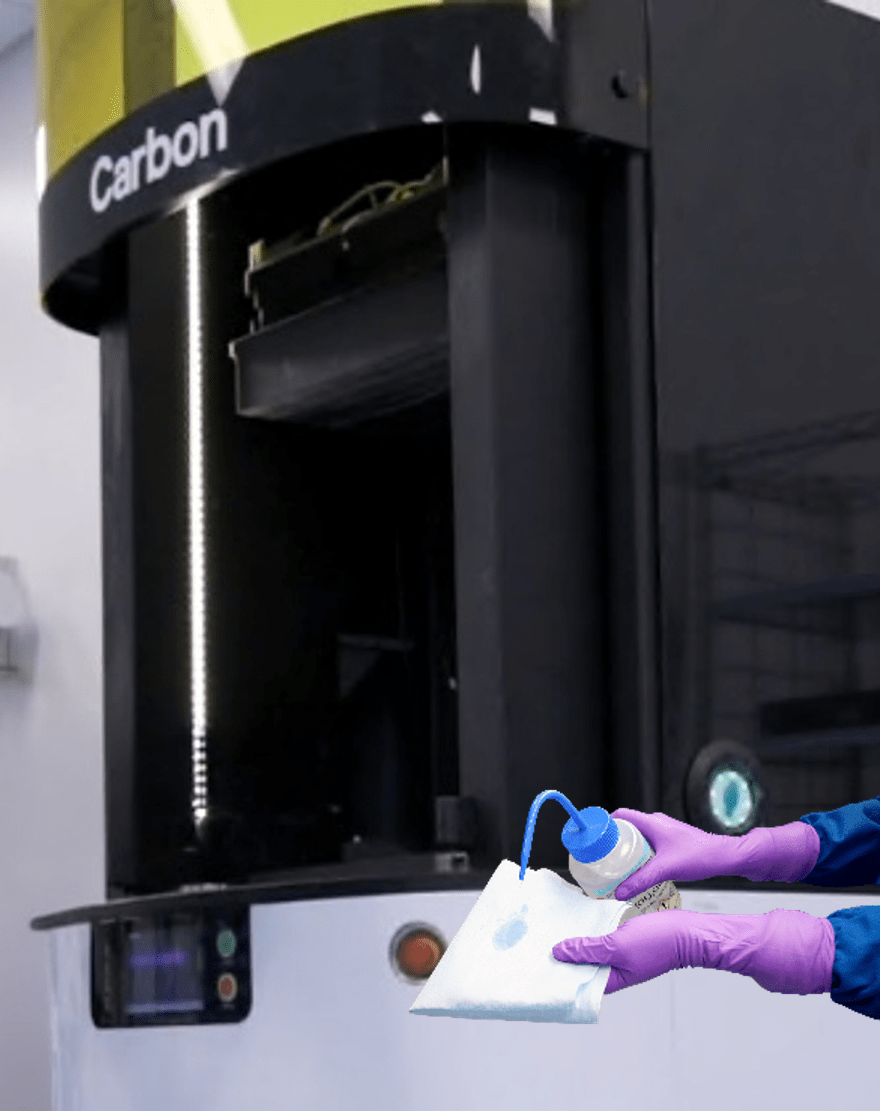
- Lightly dampen a blue shop towel with IPA, **outside of the printer**.
- **Do not saturate the towel to the point of dripping solvent.**
- Reach into the opening, and wipe the spill window glass with the towel, until it is clean, dry, and without streaks.
- **If cured resin cannot be removed in this manner, contact **[Carbon Support. ](mailto\:support@carbon3d.com)
::::VerticalSplit{layout="middle"}
:::VerticalSplitItem
:::
:::VerticalSplitItem
:::
::::
### Inspect Schunks
::::VerticalSplit{layout="middle"}
:::VerticalSplitItem
Clean schunks are important to ensure the proper seating of the platform and cassette.
1. Remove the platform.
2. Remove the cassette.
3. Inspect the **4 schunks on the underside of the build arm** and the **4 schunks on the deck **for any resin or debris that will affect schunk functionality.
:::
:::VerticalSplitItem

:::
::::
::::VerticalSplit{layout="middle"}
:::VerticalSplitItem
1. **If dirty, **first place a clean tray on the deck to keep any debris from falling onto the light engine spill window.
2. Apply IPA to a lint-free towel and clean the mating surface of each schunk.
3. **Do not apply IPA directly to the schunk. **
4. If there is cured resin on schunk, or you cannot get the schunk fully clean, contact [Carbon Support.](mailto\:support@carbon3d.com)
:::
:::VerticalSplitItem

:::
::::
### Inspect Heater Glass
::::VerticalSplit{layout="middle"}
:::VerticalSplitItem
**⚠️ Burn hazard: **The heater may be hot. Allow to cool before servicing.
1. Remove the platform.
2. Remove the cassette.
3. Inspect heater glass for any resin or particulate that will affect print performance.
4. **If dirty, contact **[Carbon Support.](mailto\:support@carbon3d.com)** Do not attempt to clean.**
:::
:::VerticalSplitItem

:::
::::
## Cassette
### Clean underside of window
::::VerticalSplit{layout="middle"}
:::VerticalSplitItem
A haze of dust can build up on the bottom of the window over time and must be removed.
1. Remove cassette from printer. Leave cassette on the cassette cart.
1. **Note:** Cassette must be clean.
2. Shine a light up from the bottom of the cassette and look down from the top of the cassette to search for contamination.
1. Contamination looks like clouding or **haze** on the underside of the cassette window.
:::
:::VerticalSplitItem

:::
::::
::::VerticalSplit{layout="middle"}
:::VerticalSplitItem
1. Take a **presaturated IPA/DI water wipe** and fold in half twice.
2. Wipe gently across the underside of the cassette window from one side to another **in a single pass.**
3. Refold to expose a new, clean surface of the wipe.
4. Repeat side to side wipe, refolding each time until entire window surface has been cleaned.
5. Repeat the wiping process with a **presaturated acetone wipe.**
6. After cleaning the underside of the cassette window, inspect for any remaining haze.
:::
:::VerticalSplitItem

:::
::::
**Note: **The three images below show the underside of the window as it goes through the cleaning process.
::::VerticalSplit{layout="middle"}
:::VerticalSplitItem

:::
:::VerticalSplitItem

:::
::::
::::VerticalSplit{layout="middle"}
:::VerticalSplitItem

:::
:::VerticalSplitItem
:::
::::
### Clean Cassette Schunks
::::VerticalSplit{layout="middle"}
:::VerticalSplitItem
1. Remove the cassette from the printer. Leave on the cassette cart.
2. Inspect the **4 schunks on the underside of the cassette** for any resin or debris.
3. **If dirty, **apply IPA to a lint-free towel and clean the mating surface of each schunk.
4. **Do not apply IPA directly to the schunk. **
:::
:::VerticalSplitItem

:::
::::
## General Lab
### Clean Working Surfaces
::::VerticalSplit{layout="middle"}
:::VerticalSplitItem
1. Use IPA and/or acetone to clean benchtops.
2. If used, change bench coverings.
3. Clean floor to remove debris and resin spills/smears/drips.
:::
:::VerticalSplitItem

:::
::::
### Check inventory of lab supplies
::::VerticalSplit{layout="right"}
:::VerticalSplitItem
1. Make sure there are enough consumable supplies available. If not, order more. These are examples of important supplies:
- IPA
- Acetone
- Gloves
- Shop towels
- Wipes
:::
:::VerticalSplitItem

:::
::::
:::::
:::::ExpandableHeading
# Monthly
## L1 Printer
::::VerticalSplit{layout="right"}
:::VerticalSplitItem
### Clean the door
1. Clean the inside and outside of the door, following instructions from [M1/M2 Printer Maintenance](docId:0YWe7YMSIyDn_IMLDVTpn).
2. **If resin needs to be removed from the door,** follow guidance [here](docId:0YWe7YMSIyDn_IMLDVTpn).
:::
:::VerticalSplitItem

:::
::::
### Backup important projects
**Carbon does not store or archive projects. **This information is stored on the printer’s onboard server, and cannot be recovered if the server is replaced, reset, or otherwise compromised.
To prevent data loss, we recommend backing up critical projects **at least once a month. **Depending on your usage and requirements, more frequent backups may be necessary.
For each printer:
::::WorkflowBlock
:::WorkflowBlockItem
In the [printer projects UI](docId:1bT3mas8msvxq9CDza67C), open the project you wish to backup.
::Image[]{src="https://res.cloudinary.com/carbon3d/image/upload/t_auto_quality_format/v1749066611/Education/Hardware/M3-M3-Max-printer/maintenance/Printer-project-ui01.png" size="50" width="1426" height="586" position="flex-start" darkWidth="1426" darkHeight="586" showCaption="false"}
:::
:::WorkflowBlockItem
In the [project UI,](docId:1bT3mas8msvxq9CDza67C) click on the project name at the top of the screen to open the Project Settings.
::Image[]{src="https://res.cloudinary.com/carbon3d/image/upload/t_auto_quality_format/v1749067382/Education/Hardware/M3-M3-Max-printer/maintenance/Click-project-name01.png" size="50" width="4136" height="2720" position="flex-start" darkWidth="4136" darkHeight="2720" showCaption="false"}
:::
:::WorkflowBlockItem
Click **Export Carbon File **and save the file in the location of your choice.
::Image[]{src="https://res.cloudinary.com/carbon3d/image/upload/t_auto_quality_format/v1749066699/Education/Hardware/M3-M3-Max-printer/maintenance/Export-carbon-file01.png" size="50" width="886" height="928" position="flex-start" darkWidth="886" darkHeight="928" showCaption="false"}
:::
:::WorkflowBlockItem
Repeat Steps 1 - 3 for each project you wish to save.
:::
::::
## General Lab
::::VerticalSplit{layout="right"}
:::VerticalSplitItem
### Clean and/or replace any soiled PPE items.
1. Check lab coats, glasses, and any other reusable personal protective items for contamination.
2. Wash or replace soiled items.
:::
:::VerticalSplitItem

:::
::::
:::::
:::::ExpandableHeading
# Quarterly
## L1 Printer
::::VerticalSplit{layout="middle"}
:::VerticalSplitItem
### Inspect fan filters
1. Find the **intake fan ports** located on the back of the L1 printer.
2. Pull the **black plastic fan filter cover** off with your hands. If necessary, you may use a flat-edged tool to aid in removal, taking care not to scratch the paint.
3. Inspect the **filter.** If it is discolored, change the filter.
4. Discard the dirty filter in the regular waste bin.
5. Insert new filter. There is no designated front or back side, so either orientation is sufficient.
6. Gently snap the fan filter cover back in place.
:::
:::VerticalSplitItem

:::
::::
:::::
:::::ExpandableHeading
# Annually
## Chiller
::::VerticalSplit{layout="right"}
:::VerticalSplitItem
### Change coolant
1. Typically the coolant should be changed once per year.
2. Coolant will need to be added in the event of a low fluid alarm. Consult the manual for more information.
- [Polyscience Chiller Manual - New Model February 2021 ](docId:2sKhKlz4PfBvk8EykK9Wl)
- [Legacy Polyscience Chiller Manual](docId:2sKhKlz4PfBvk8EykK9Wl)
:::
:::VerticalSplitItem

:::
::::
:::::
:::::::ExpandableHeading
# As Needed
## L1 Printer
### Restart after a power surge or outage
::::::WorkflowBlock
:::::WorkflowBlockItem
Check power connections
::::VerticalSplit{layout="middle"}
:::VerticalSplitItem
- L1 printer
- Compressed air
- Oxygen concentrator (if used)
- Chiller
:::
:::VerticalSplitItem

:::
::::
:::::
:::WorkflowBlockItem
Check that power is restored in your facility
:::
:::WorkflowBlockItem
Ensure chiller is running
:::
:::WorkflowBlockItem
Check yellow LED on oxygen concentrator
- If LED is lit, follow [purge instructions](docId:2sKhKlz4PfBvk8EykK9Wl).
:::
:::WorkflowBlockItem
Press the **silver reset button** on back of L1 printer to regain power.
::Image[]{src="https://api.archbee.com/api/optimize/3CesIL2dYMCHPZvRjp8S0/g9s_8w72indYdoFx8tb0I_image.png" size="50" width="893" height="503" position="flex-start" darkWidth="893" darkHeight="503" showCaption="false"}
:::
::::::
If a power failure occurred during printing, the display will show **Need Help.**
1. Press the** Need Help **button.
- The display will show Raise Platform.
2. Press the **Raise Platform** button.
- The display will show Resetting while the platform is lifted to the home position. It is normal for the platform to move slowly.
3. Once the platform has reached the home position, the printer will be available to print.
- If it takes more than 10 minutes for the platform to reach the home position, contact [Carbon Support](docId\:K86Zo5vcyN_wqJL3vdGFt).
### Power Cycle
At times, it may be necessary to turn off the printer and then turn it back on.
:::hint{type="info"}
If possible, be sure all print jobs are complete and the platform is in the home position before beginning the power cycle process.
:::
::::WorkflowBlock
:::WorkflowBlockItem
Access the back of the printer.
:::
:::WorkflowBlockItem
Locate the red **power switch** in the upper right portion of the back of the printer and turn it **off.**
::Image[]{src="https://res.cloudinary.com/carbon3d/image/upload/t_auto_quality_format/v1754525570/Education/Hardware/L1-Printer/maintenance/Power_switch_off_01.png" size="50" width="3868" height="3175" position="flex-start" darkWidth="3868" darkHeight="3175" showCaption="false"}
:::
:::WorkflowBlockItem
Wait 30 seconds.
:::
:::WorkflowBlockItem
Turn the red power switch **on.**
::Image[]{src="https://res.cloudinary.com/carbon3d/image/upload/t_auto_quality_format/v1754525595/Education/Hardware/L1-Printer/maintenance/Power_switch_on_02.png" size="50" width="1492" height="1545" position="flex-start" darkWidth="1492" darkHeight="1545" showCaption="false"}
:::
:::WorkflowBlockItem
Locate the **silver reset button** in the middle left portion of the back of the printer and press it.
::Image[]{src="https://res.cloudinary.com/carbon3d/image/upload/t_auto_quality_format/v1754525620/Education/Hardware/L1-Printer/maintenance/Reset_button_02.png" size="50" width="4307" height="3175" position="flex-start" showCaption="false"}
:::
:::WorkflowBlockItem
The printer is ready when the display shows the next project in the queue.
:::
::::
## Cassette
### Clean guide slots
::::VerticalSplit{layout="middle"}
:::VerticalSplitItem
- Clean the guide slots on the L1 cassette as needed to remove shiny resin spots.
- Use an acetone wipe or and acetone dampened lint free towel or wipe.
:::
:::VerticalSplitItem

:::
::::
:::::::
::::VerticalSplit{layout="middle"}
:::VerticalSplitItem
Place the cassette on the top of the [L1 Cassette Hotel](docId\:ftdXaH-nqrn4hOzPPb1WS) or a workbench to access the guide slots.
:::
:::VerticalSplitItem

:::
::::
::::VerticalSplit{layout="middle"}
:::VerticalSplitItem
When not using the L1 Cassette Cart, **two people** are required to move the cassette.
:::
:::VerticalSplitItem

:::
::::